Store Locator Extension for Magento 2
Take customer service a step further by helping shoppers locate your stores on Google Map. Extendware’s Store Locator extension makes it easy to add this function to your Magento ecommerce store. This Magento 2 Extension offers many features that make it simple to configure this on the back-end. Some features of this exciting extension include
Works with Google Maps to share information about stores via zip code or city/state.
Allows you to edit a store’s information such as hours of operation and holidays in just minutes.
Display multiple stores on the map.
Why Do You Need A Store Locator?
Magento Store Locator extension helps your customers locate and get to your store or multiple branches with Store Locator for Magento 2.
Today’s consumers like having the option of shopping online or in the store. Therefore, many retailers have not abandoned the brick and mortar stores but instead have added an eCommerce platform to their business. Smart retailers will make sure that their e-commerce stores work seamlessly with their brick and mortar stores. Interconnected, the two arms of the business should function as one to provide customers with the best shopping experience. One way to unify an online and brick and mortar store is to give customers the option of picking up their purchase in the store.
Interested in Extension Installation Service?
Visit our installation service page https://www.extendware.com/magento-extension-installation-service.html for more information
Support
Got questions? Feel free to contact us! Support Form.
Installation Procedure
Type 1: Zip file
Download your extension package from the Download page after purchasing the extension.
Open the extension ZIP file you downloaded and extract it to a directory on your computer using a tool like WinRar, WinZIP or similar.
Upload the extracted files to the app/code/Extendware directory in your Magento installation, maintaining the folder structure. If updating, overwrite the existing files.
Connect via SSH and run the following commands (make sure to run them as the user who owns the Magento files!
php bin/magento module:enable --clear-static-content Extendware_Core

php bin/magento module:enable --clear-static-content Extendware_StoreLocator

php bin/magento setup:upgrade

php bin/magento setup:di:compile

php bin/magento setup:static-content:deploy
Type 2: Via Composer (recommended)
You can freely install, update, and remove Magento 2 extensions using Composer.
Please request your private access first via Support Form.
Add the custom repository to the composer.json
composer config repositories.private-packagist composer https://extendware.repo.packagist.com/your-company-name/
Setup authentication
composer config --auth http-basic.extendware.repo.packagist.com token YOUR-PRIVATE-TOKEN
Install the module
composer require extendware/module-storelocator
run the following commands
php bin/magento module:enable --clear-static-content Extendware_Core

php bin/magento module:enable --clear-static-content Extendware_StoreLocator

php bin/magento setup:upgrade

php bin/magento setup:di:compile

php bin/magento setup:static-content:deploy
USER GUIDE
You will find all extendware settings in Admin Panel → Extendware Menu

Store Locator General Configuration
To configure the extension you need to go to Admin Panel → Extendware Menu → Store Configuration → Map and Locator Setting.
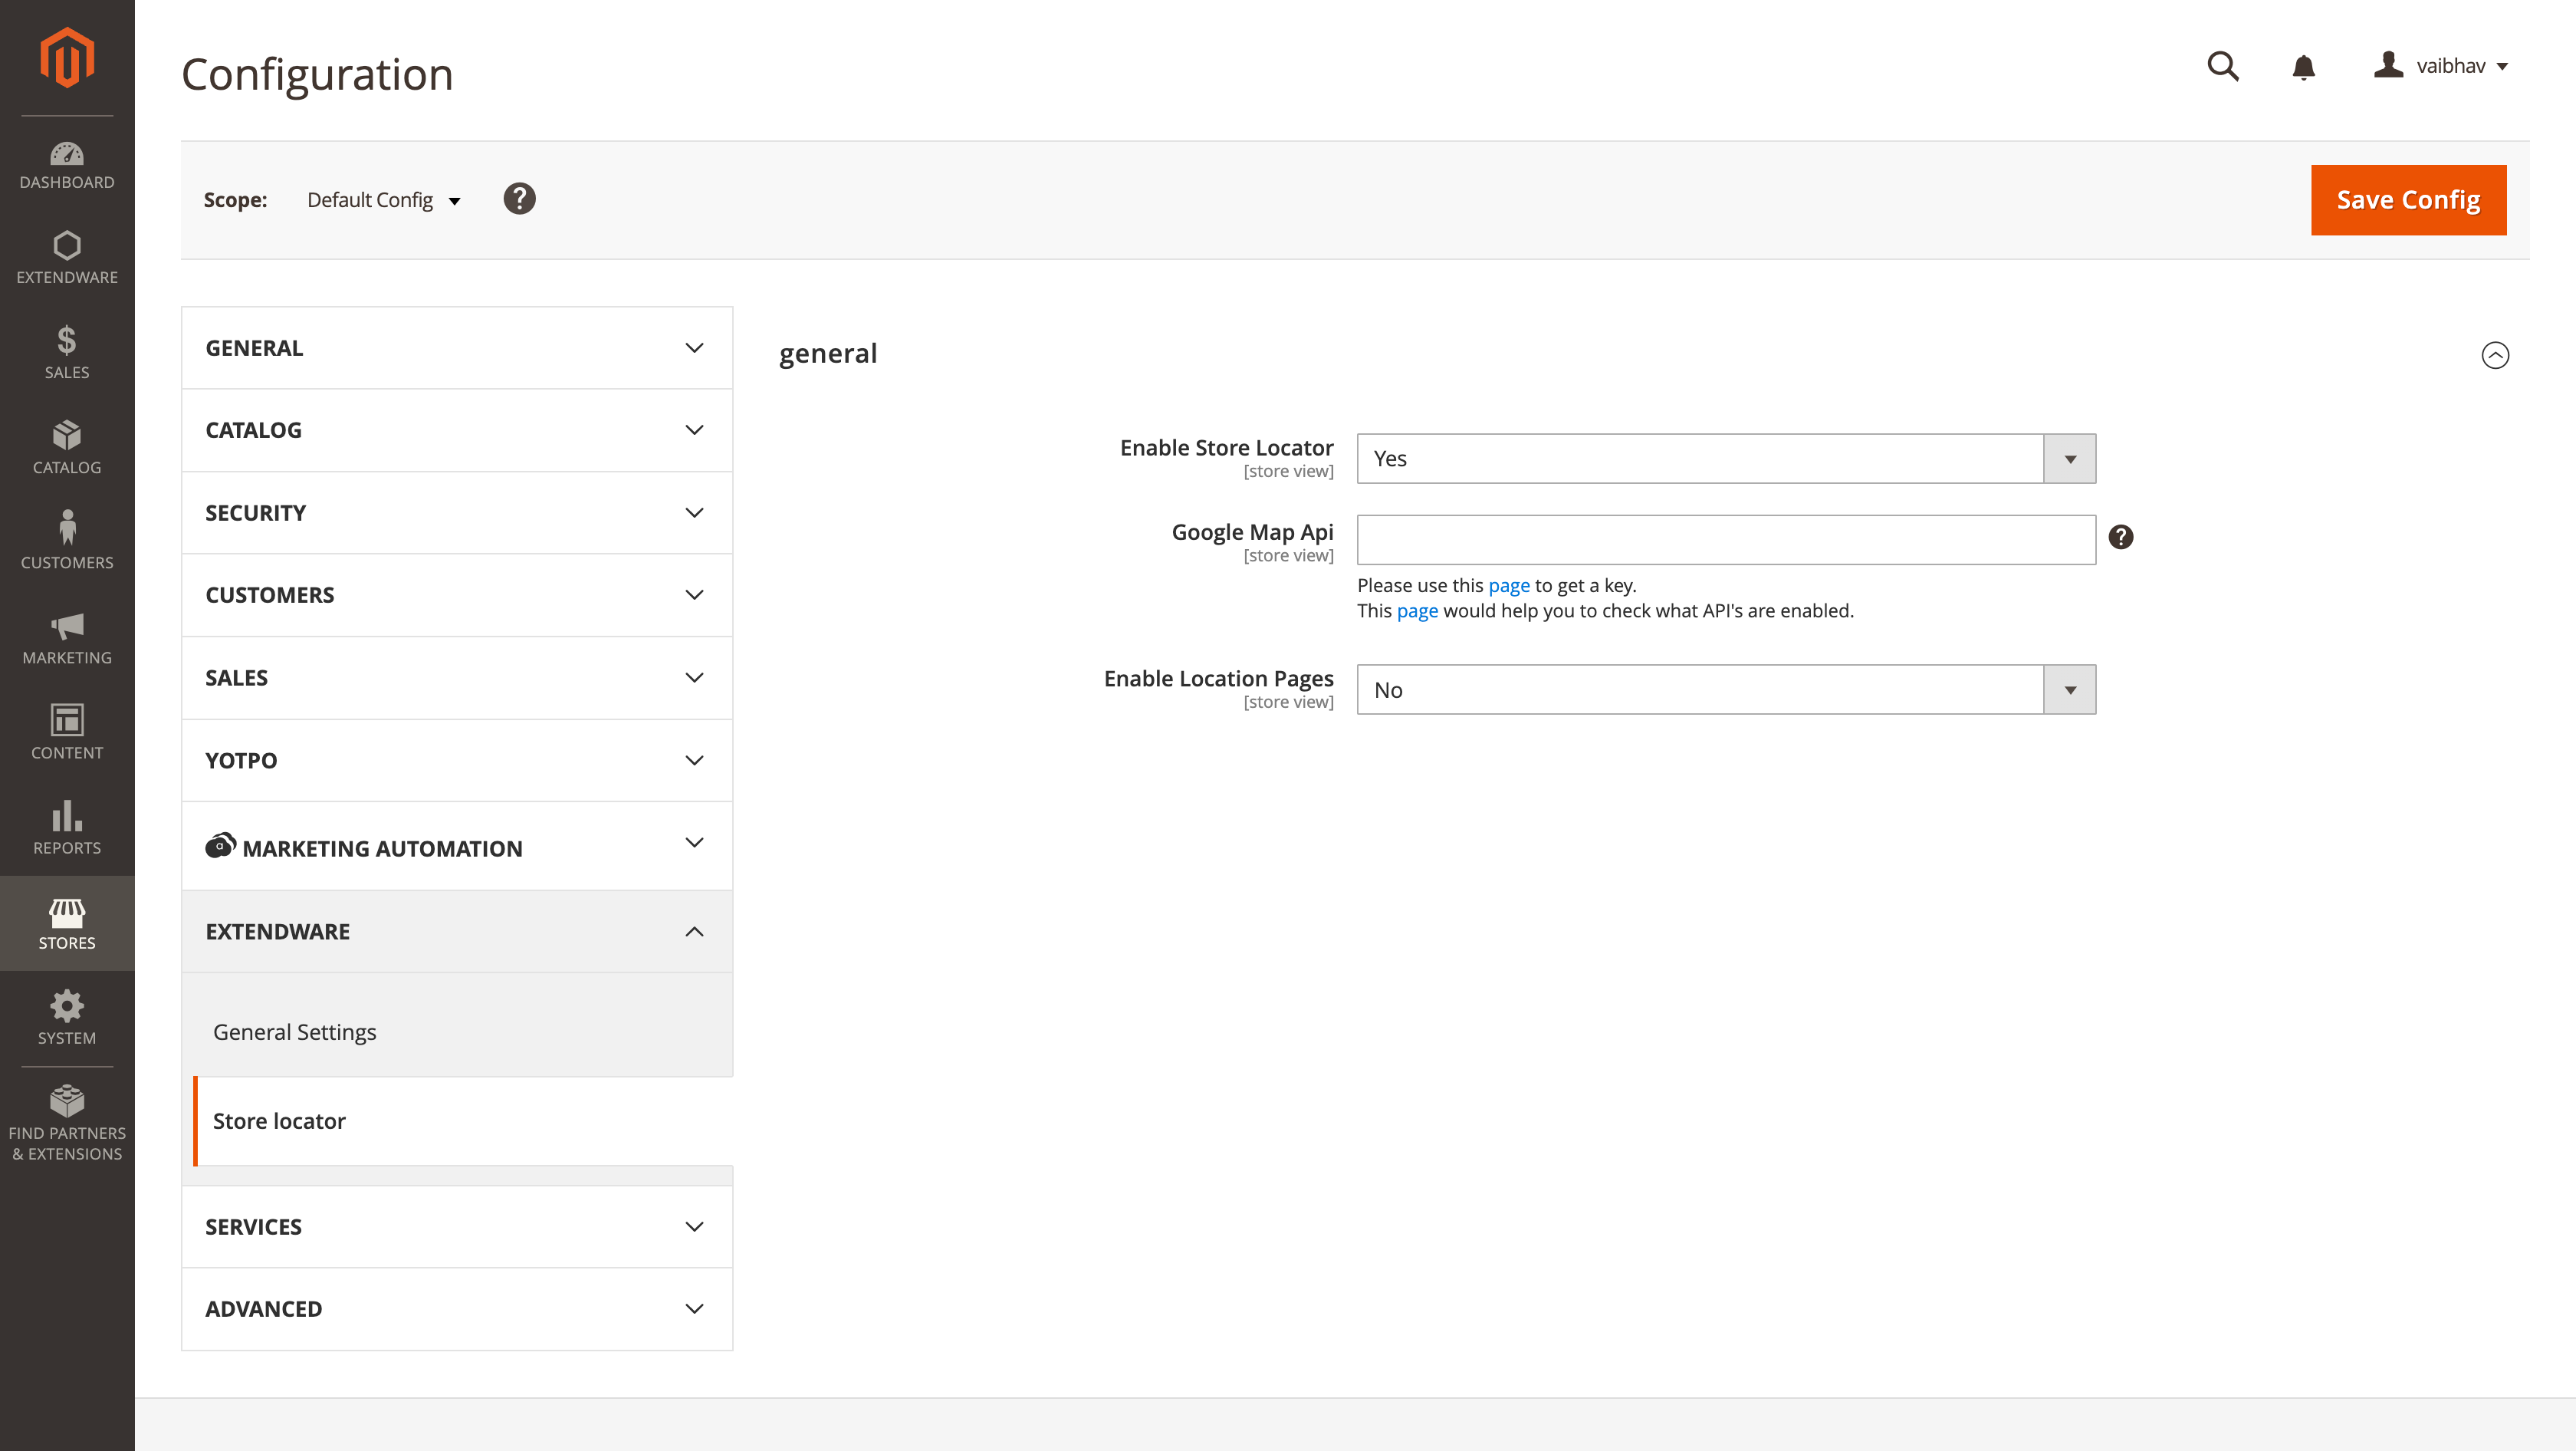
Enable Store Locator - To enable/disable store locator. Select “Yes” to enable the store locator.
Google Map Api - Enter API key for google map. Here is more information on how to generate api key for google map https://developers.google.com/maps/documentation/javascript/get-api-key
Enable Location Pages - If “Yes” then the system will auto generate store pages based on store data.
Manage Store Locator
You can manage or add new stores from Admin Panel → Extendware Menu → Store Location Content → Store Locations.
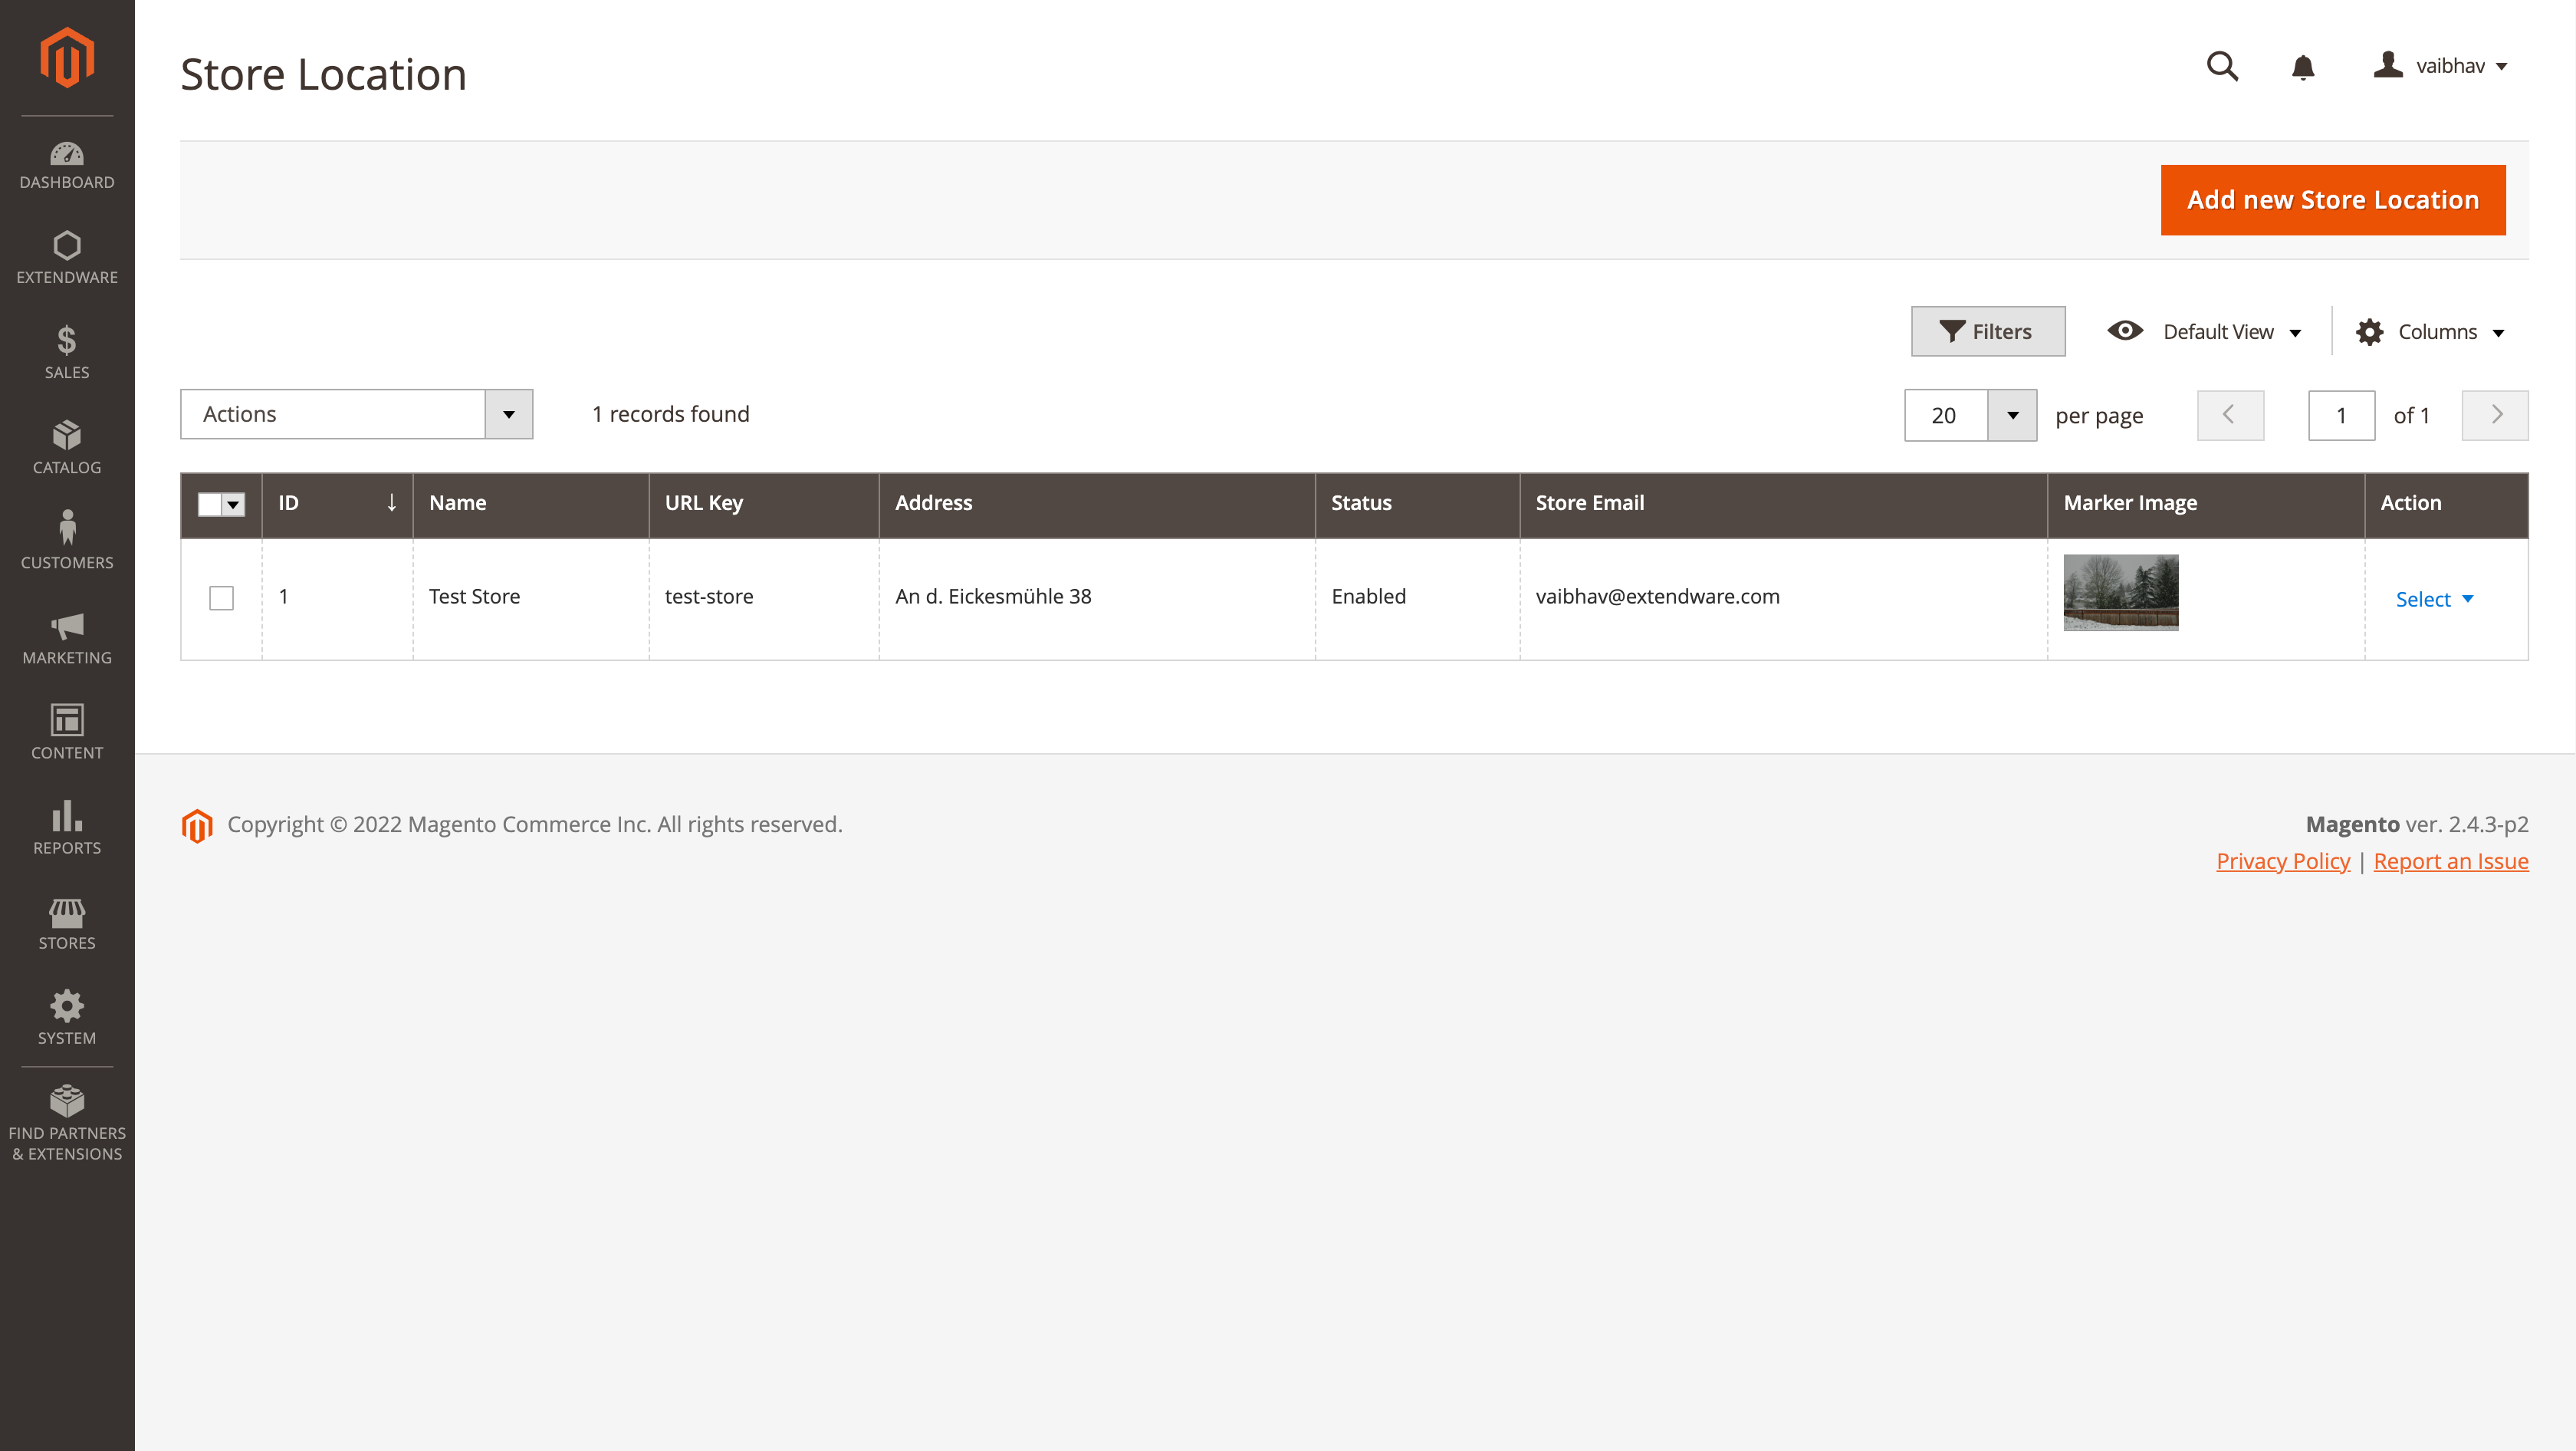
From this page admin can see all available store, edit/delete existing store or admin can create new store using Add New Store Location button
Add New/Edit Store Locator.
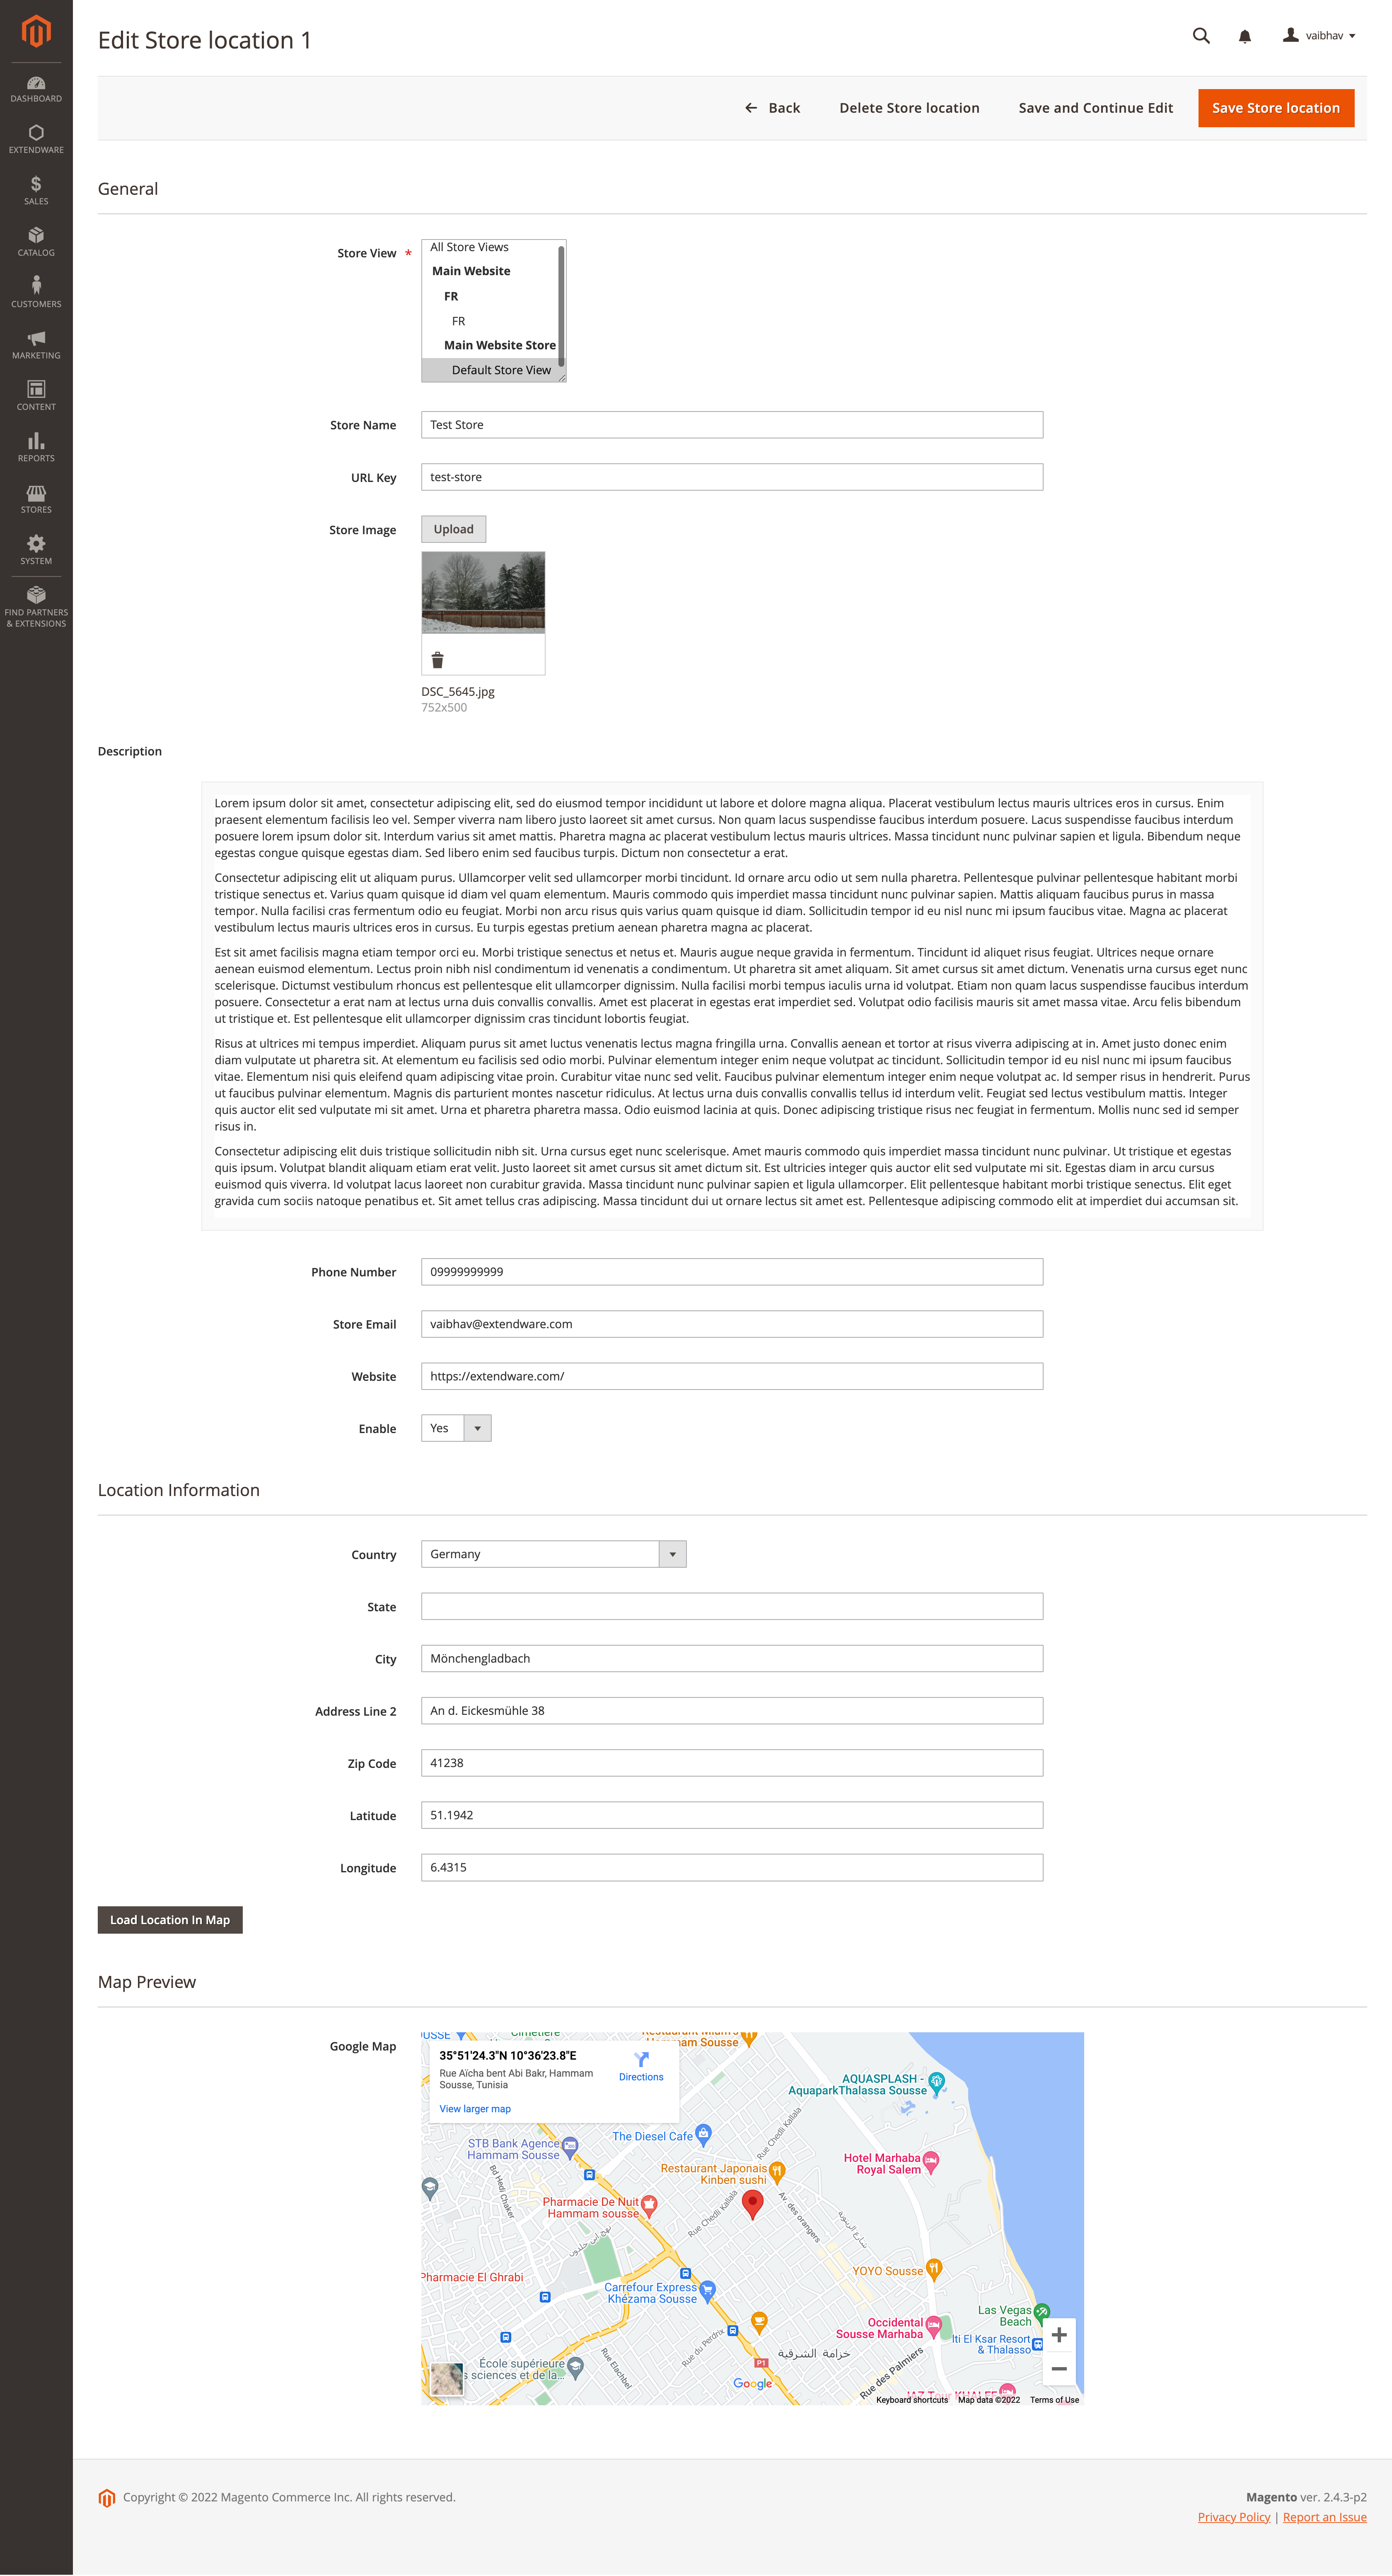
Store View - Select for which store view this store is visible.
Store Name - Name of the store which will be displayed on map and store page.
URL Key - Url key for the store page.
Store Image - Store image icon which will display on map and store page.
Description - Admin can add store detail in description which will be displayed on the store page.
Phone Number - Phone number to contact the store.
Store Email - Store email address to contact the store.
Website - Store website if the store has any other website or admin can create a page for the store and add URL here.
Enable - If yes then only the store will be displayed on the map.
Location Information - Here admin can enter store location information so customers can visit the store. Admin can enter Country,State,City, Address and Zip Code
Latitude - Latitude of the store E.g.. 51.1942.
Longitude - Longitude of the store E.g. 6.4315.
Based on Latitude and Longitude information stores will be displayed on google map.
Frontend.
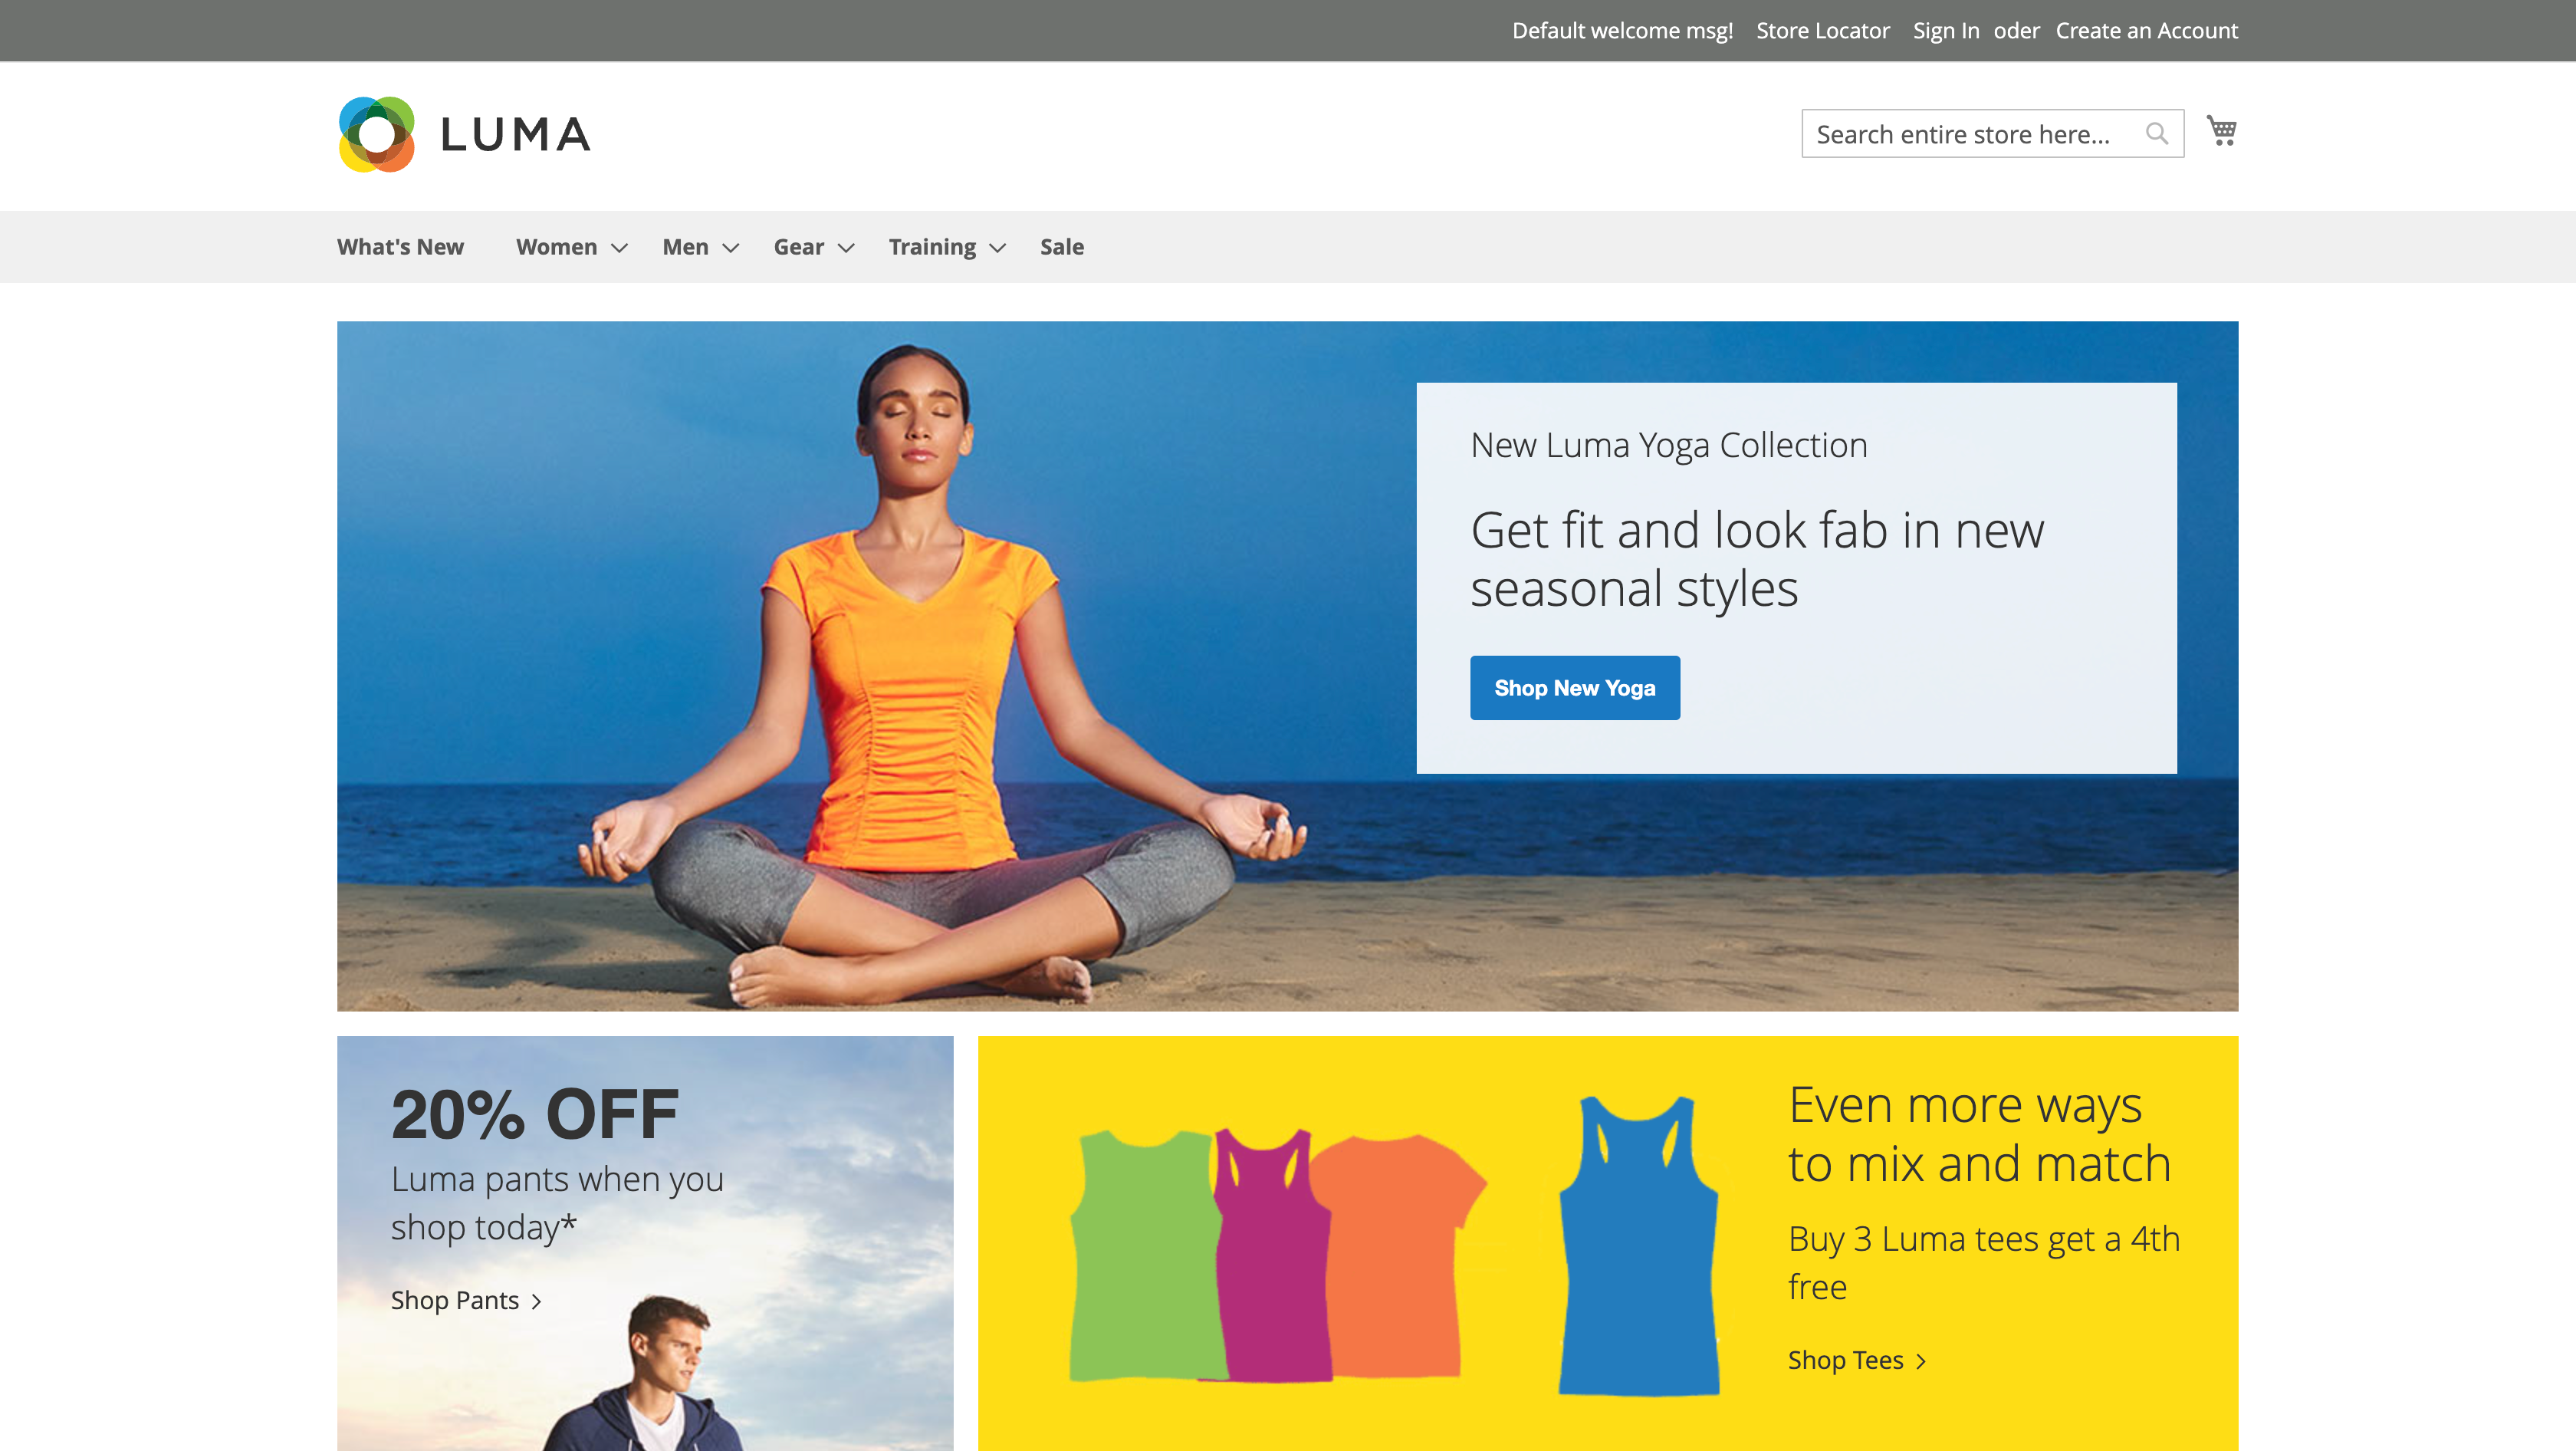
Store link will be displayed with header links. Customers can navigate to all store page using Store Locator link from the header.
Store locator list page
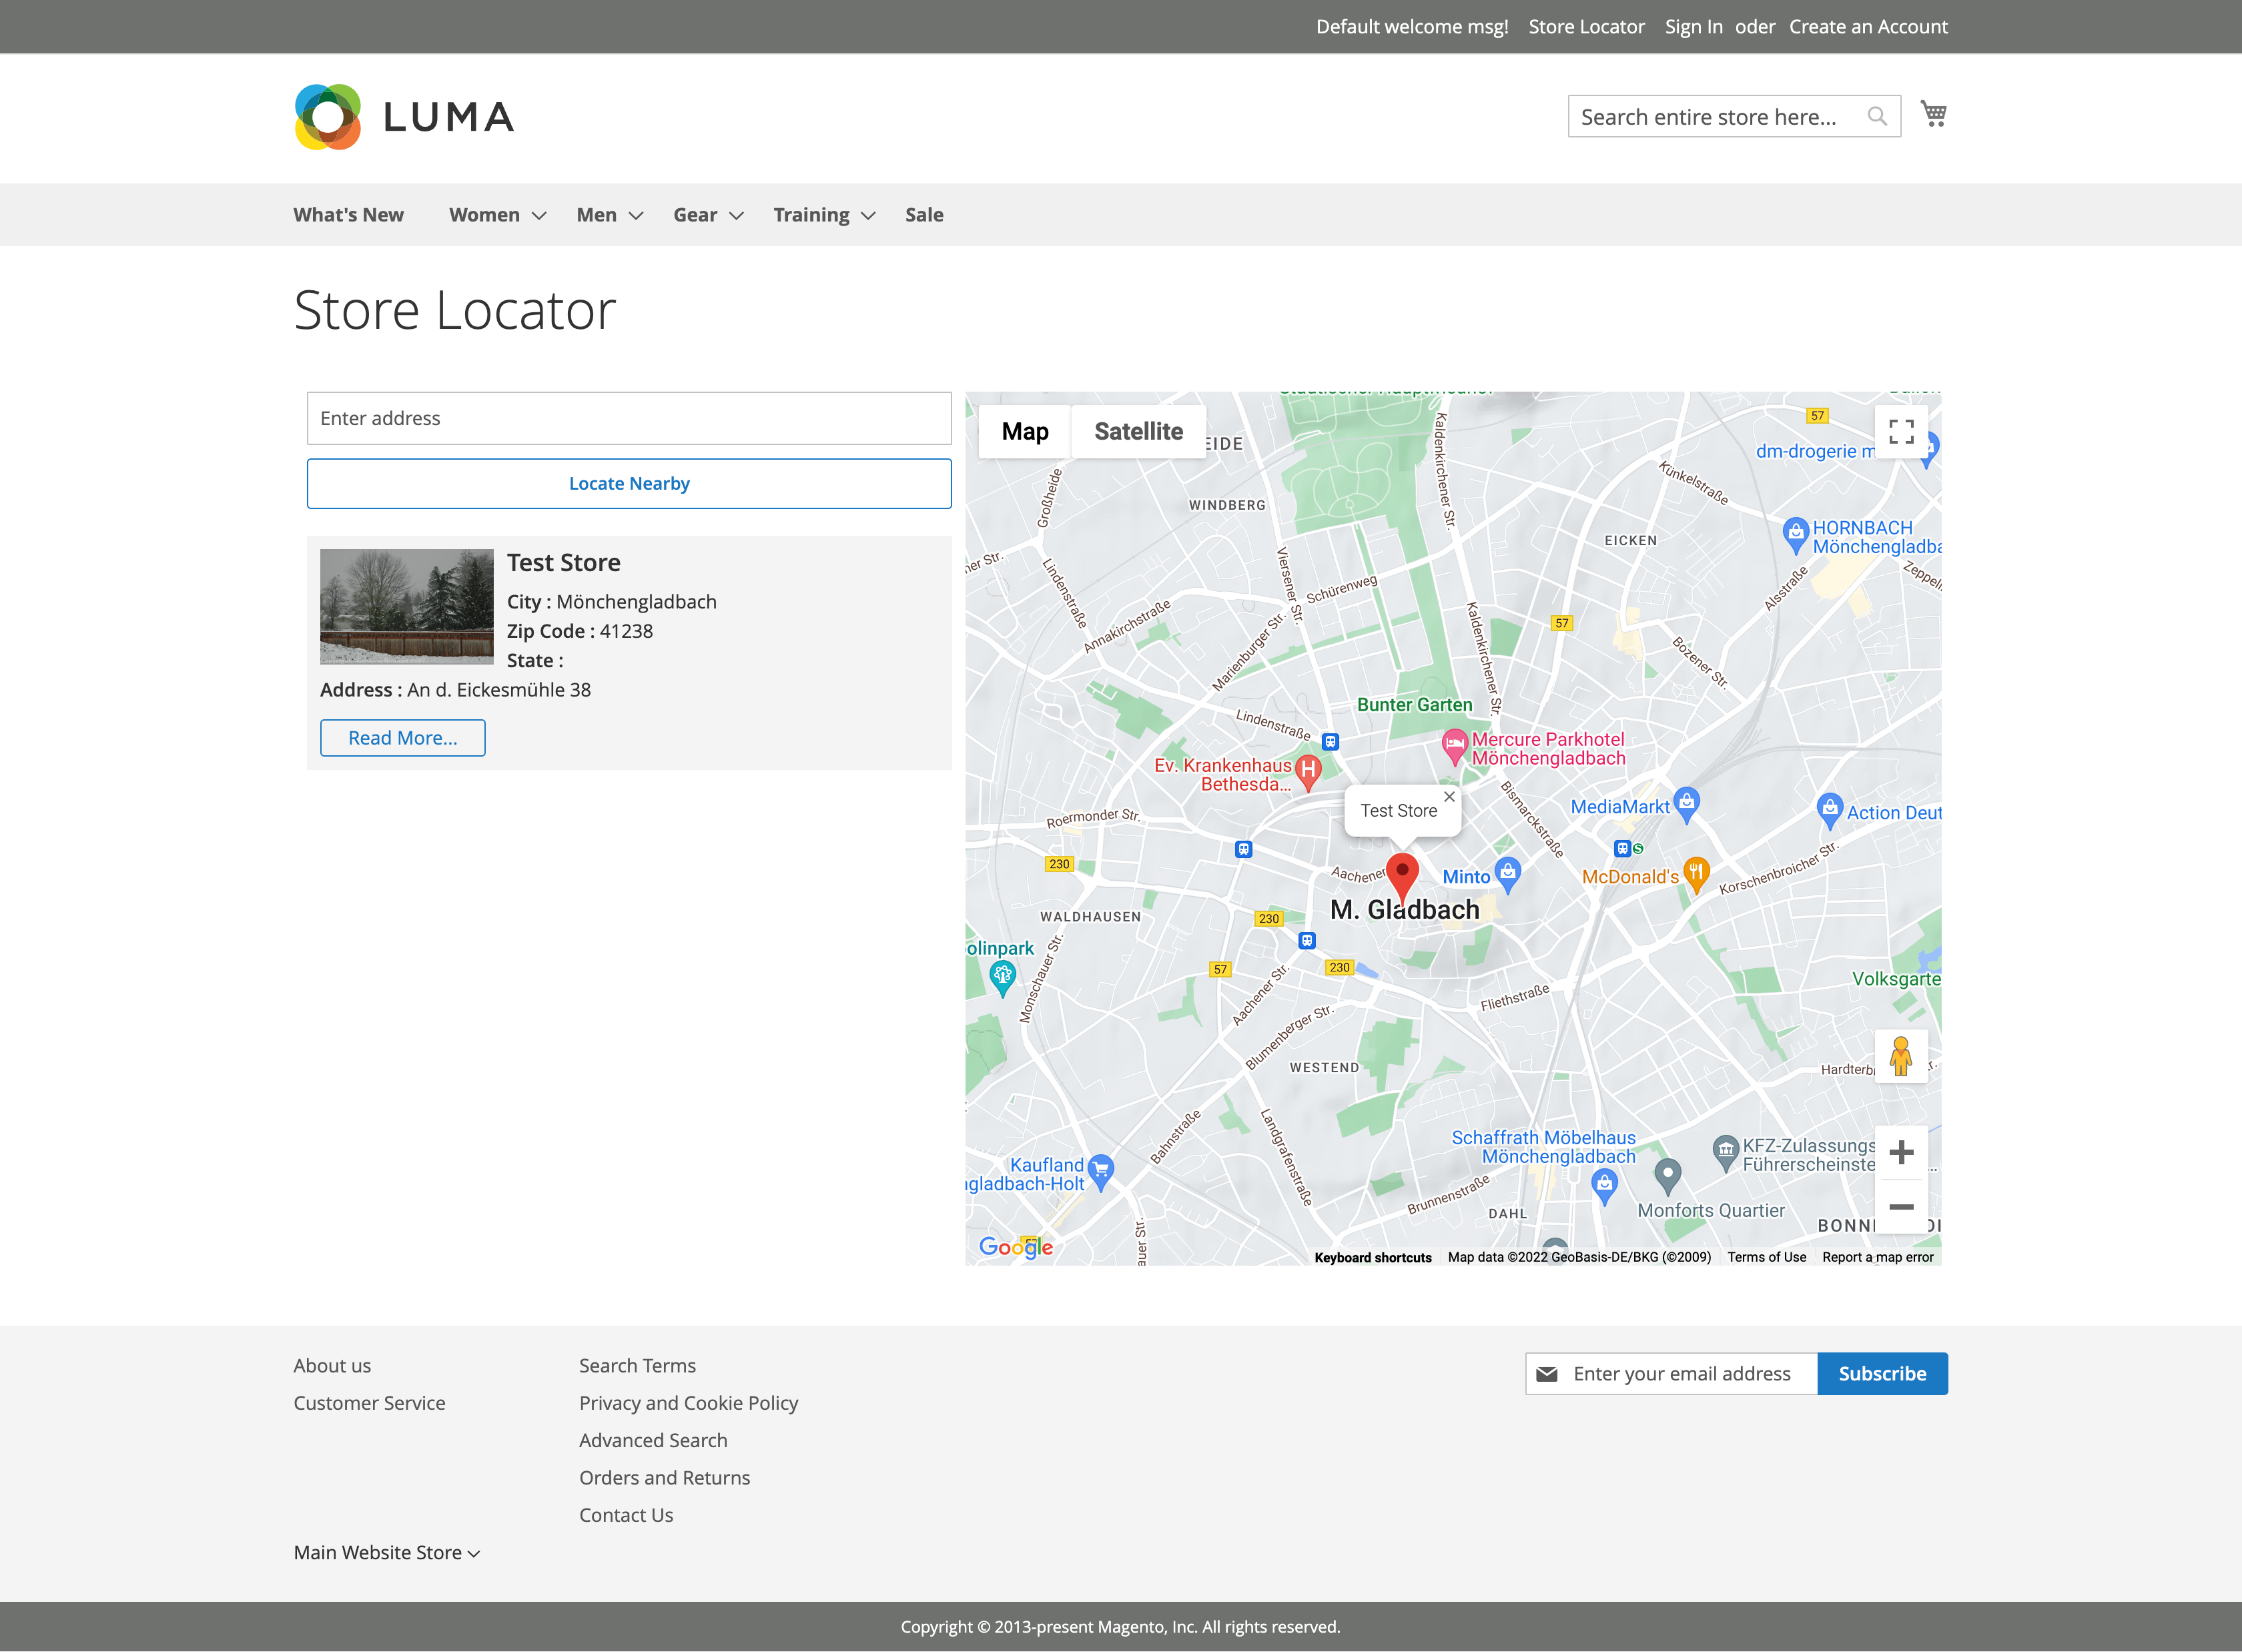
When a customer clicks on the Store locator link from the header, they will redirect to the store list page. On this page customers can see all store lists with location on map.
Customers can find nearby stores or they can add customer location and based on that system will find nearby stores to the customer.
Store Details Page
On the store details page customers can see all the details of the store.
Changelog
All notable changes to this project will be documented here.
[2.0.0]
Fixed
Resolved issue with undefined lat key in Store Locator helper when IP geolocation API fails.
Corrected self-closing
tags in Knockout templates to comply with HTML standards.
Changed
Applied Magento coding standards across updated files for consistency.
[1.2.0]
Fixed
Update menu sorting in the admin view.
[1.0.0]
Added
First release