Extendware DeeplTranslator Glossary Extension for Magento 2
Extendware DeeplTranslator Glossary Extension for Magento 2 enables seamless integration with the DeepL Translator. This extension allows users to manage glossaries directly from the Magento admin panel, offering options to create, view, and delete glossaries. These glossaries ensure consistent translation of specific terms across various languages supported by the DeepL API.
Important Migration Notice
DeepL Glossary API v3 introduces a new multi-dictionary structure.
Glossaries created with API v2 cannot be reused and must be recreated in v3.
Please recreate your glossaries before using the Sync feature.
Extendware DeepL Translator – Glossary Features
Glossary-Based Translation
Translates defined glossary terms exactly as specified, while all other content is translated dynamically via the DeepL API.Glossary Management from Admin
Create, edit, and manage glossary entries directly from the Magento Admin using the Glossary Grid.One-Click Glossary Synchronization
Sync local glossary entries with the DeepL Glossary API in a single click to keep translations consistent and up to date.
Interested in Extension Installation Service?
Visit our installation service page https://www.extendware.com/magento-extension-installation-service.html for more information
Support
Got questions? Feel free to contact us! Support Form.
Installation Procedure
Type 1: Zip file
Download your extension package from the Download page after purchasing the extension.
Open the extension ZIP file you downloaded and extract it to a directory on your computer using a tool like WinRar, WinZIP or similar.
Upload the extracted files to the app/code/Extendware directory in your Magento installation, maintaining the folder structure. If updating, overwrite the existing files.
Connect via SSH and run the following commands (make sure to run them as the user who owns the Magento files!
php bin/magento module:enable --clear-static-content Extendware_Core

php bin/magento module:enable --clear-static-content Extendware_DeeplTranslator

php bin/magento module:enable --clear-static-content Extendware_DeeplTranslatorGlossary

php bin/magento setup:upgrade

php bin/magento setup:di:compile

php bin/magento setup:static-content:deploy
Type 2: Via Composer (recommended)
You can freely install, update, and remove Magento 2 extensions using Composer.
Please request your private access first via Support Form.
Add the custom repository to the composer.json
composer config repositories.private-packagist composer https://extendware.repo.packagist.com/your-company-name/
Setup authentication
composer config --auth http-basic.extendware.repo.packagist.com token YOUR-PRIVATE-TOKEN
Install the module
composer require extendware/module-deepltranslatorglossary
run the following commands
php bin/magento module:enable --clear-static-content Extendware_Core

php bin/magento module:enable --clear-static-content Extendware_DeeplTranslator

php bin/magento module:enable --clear-static-content Extendware_DeeplTranslatorGlossary

php bin/magento setup:upgrade

php bin/magento setup:di:compile

php bin/magento setup:static-content:deploy
User Guide
We highly recommend gathering all the below information, before starting the installation.
Installation in your Magento Online Shop
Type 1: Zip file
Unzip the zip file in
app/code/ExtendwareEnable the module by running
php bin/magento module:enable Extendware_DeeplTranslatorGlossaryApply database updates by running
php bin/magento setup:upgradeFlush the cache by running
php bin/magento cache:flush
Create a new Glossary
Navigate to Extendware -> Deepl Glossary -> Add Glossary then click on Add new Glossary.
Glossary Name: Allows you to set a custom name for the glossary you are creating or editing.
Glossary ID: A system-generated unique identifier for the glossary, created when the “Sync Glossary” button is clicked.
Enable: A toggle to indicate whether the glossary is ready to be used with the DeepL API.
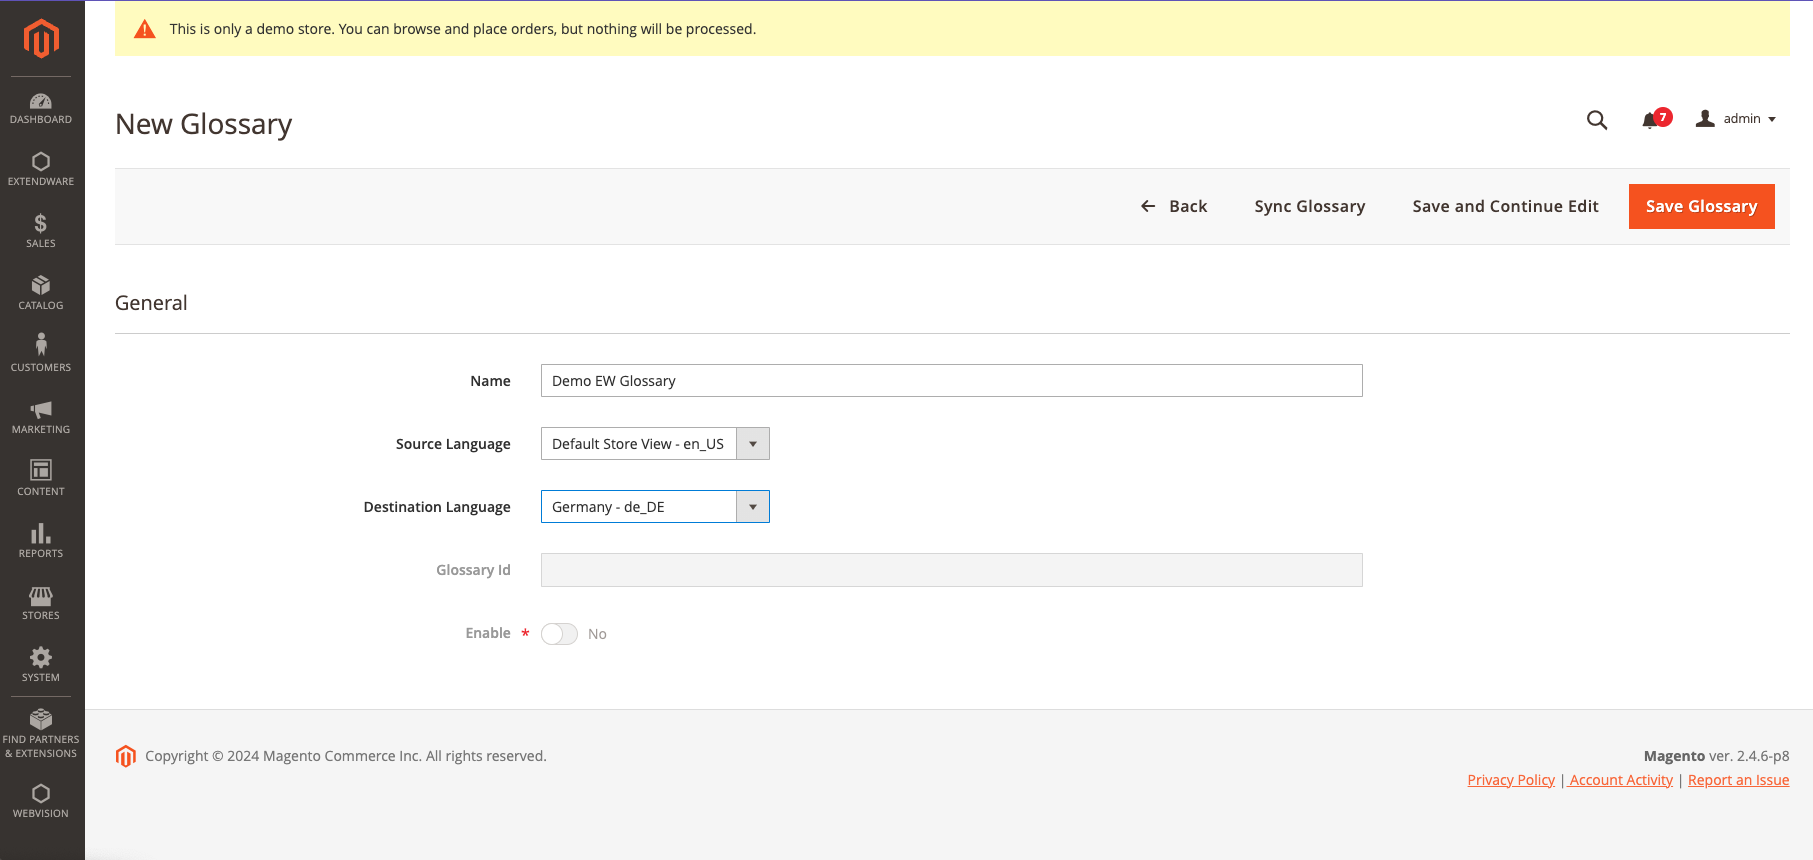
Additionally, there are action buttons for:
Delete Glossary: Removes the current glossary.
Sync Glossary: Synchronizes the glossary with the DeepL API.
Save Glossary: Saves the glossary along with its terms and translations.
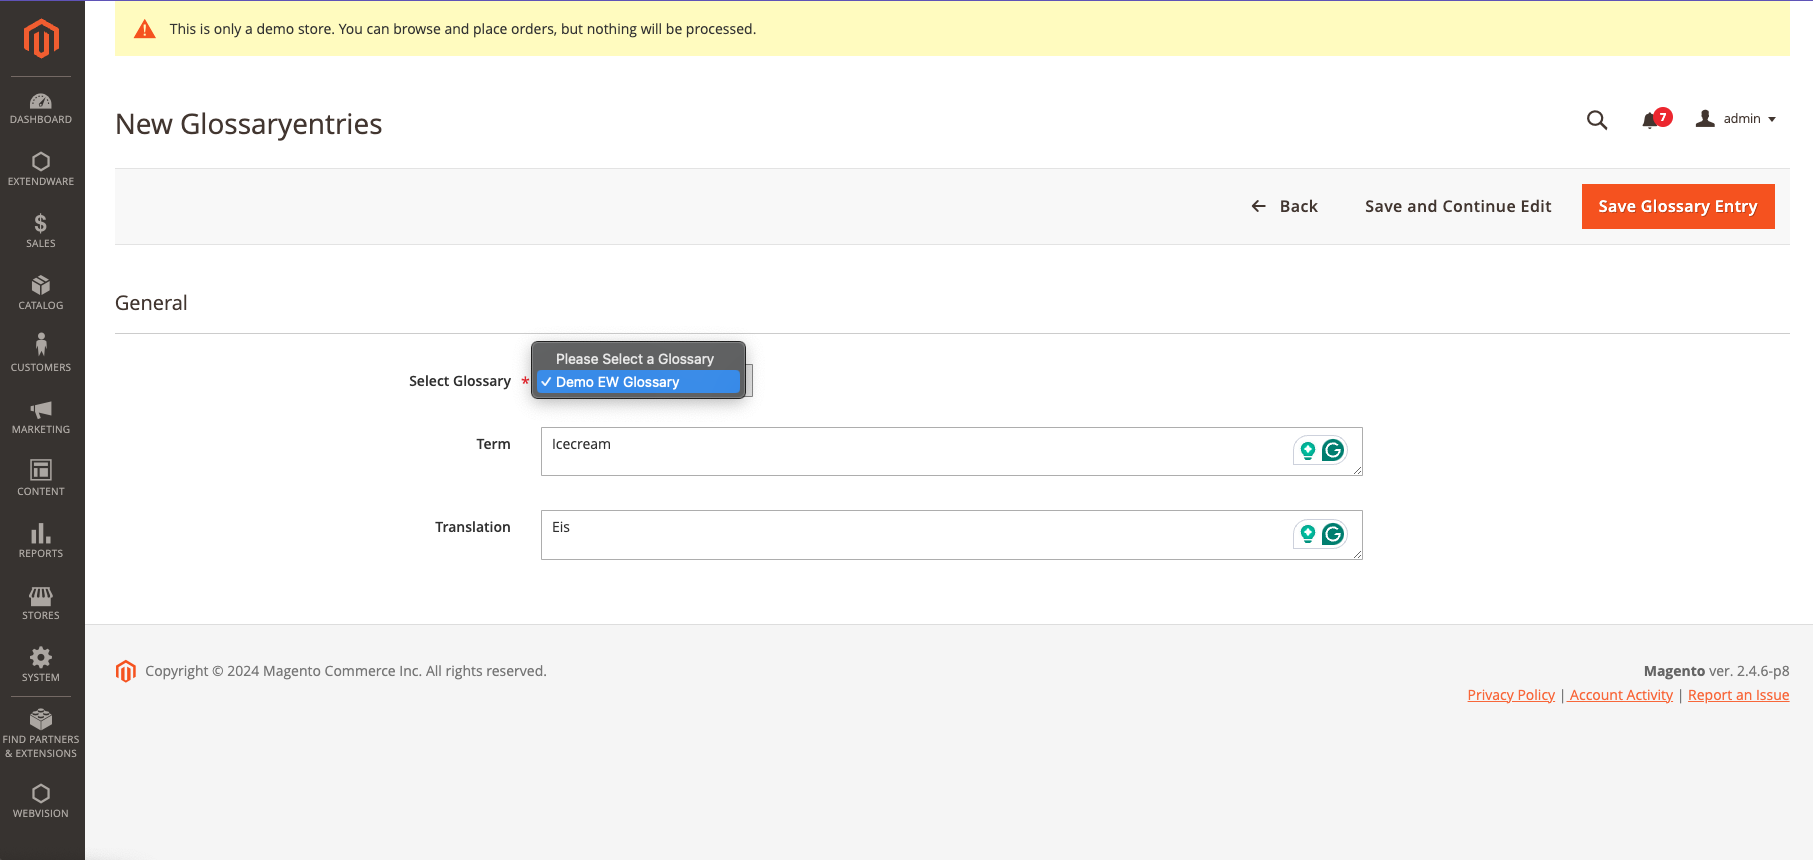
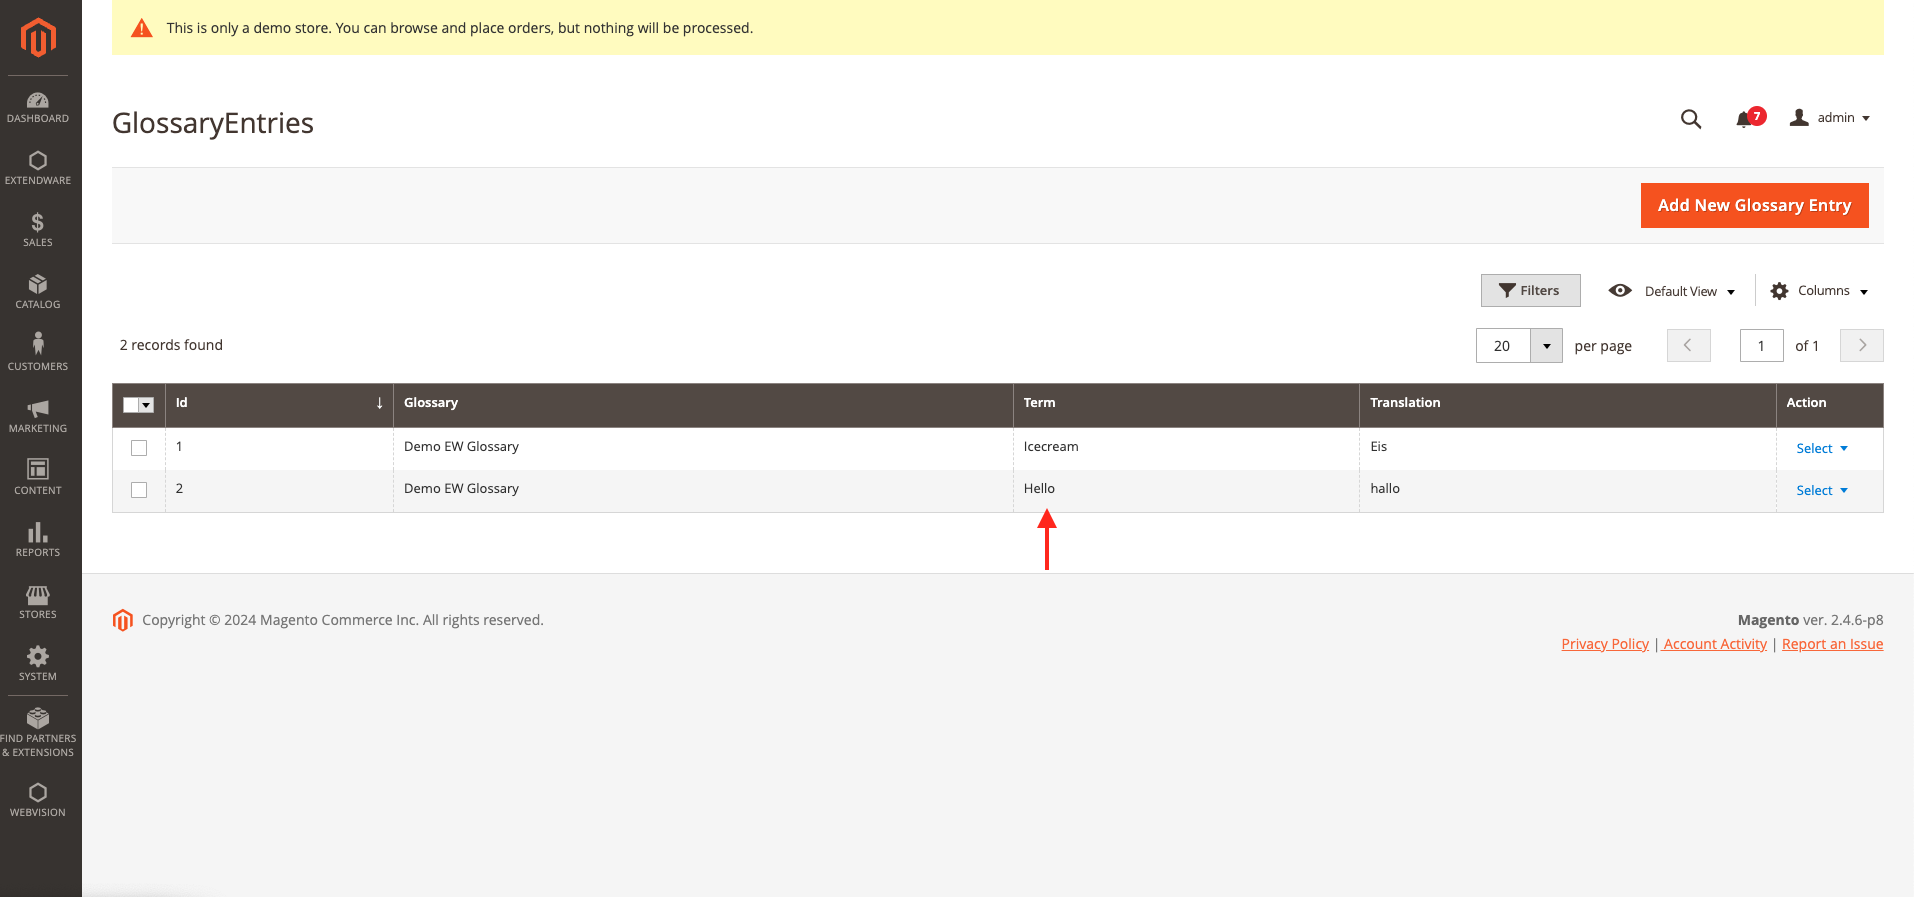
GlossaryEntries Configuration
Select Glossary: Choose the glossary to which this entry belongs.
Term: Enter the source term.
Translation: Enter the translated value.
Source Language: Select the language of the original term.
Target Language: Select the language into which the term should be translated.
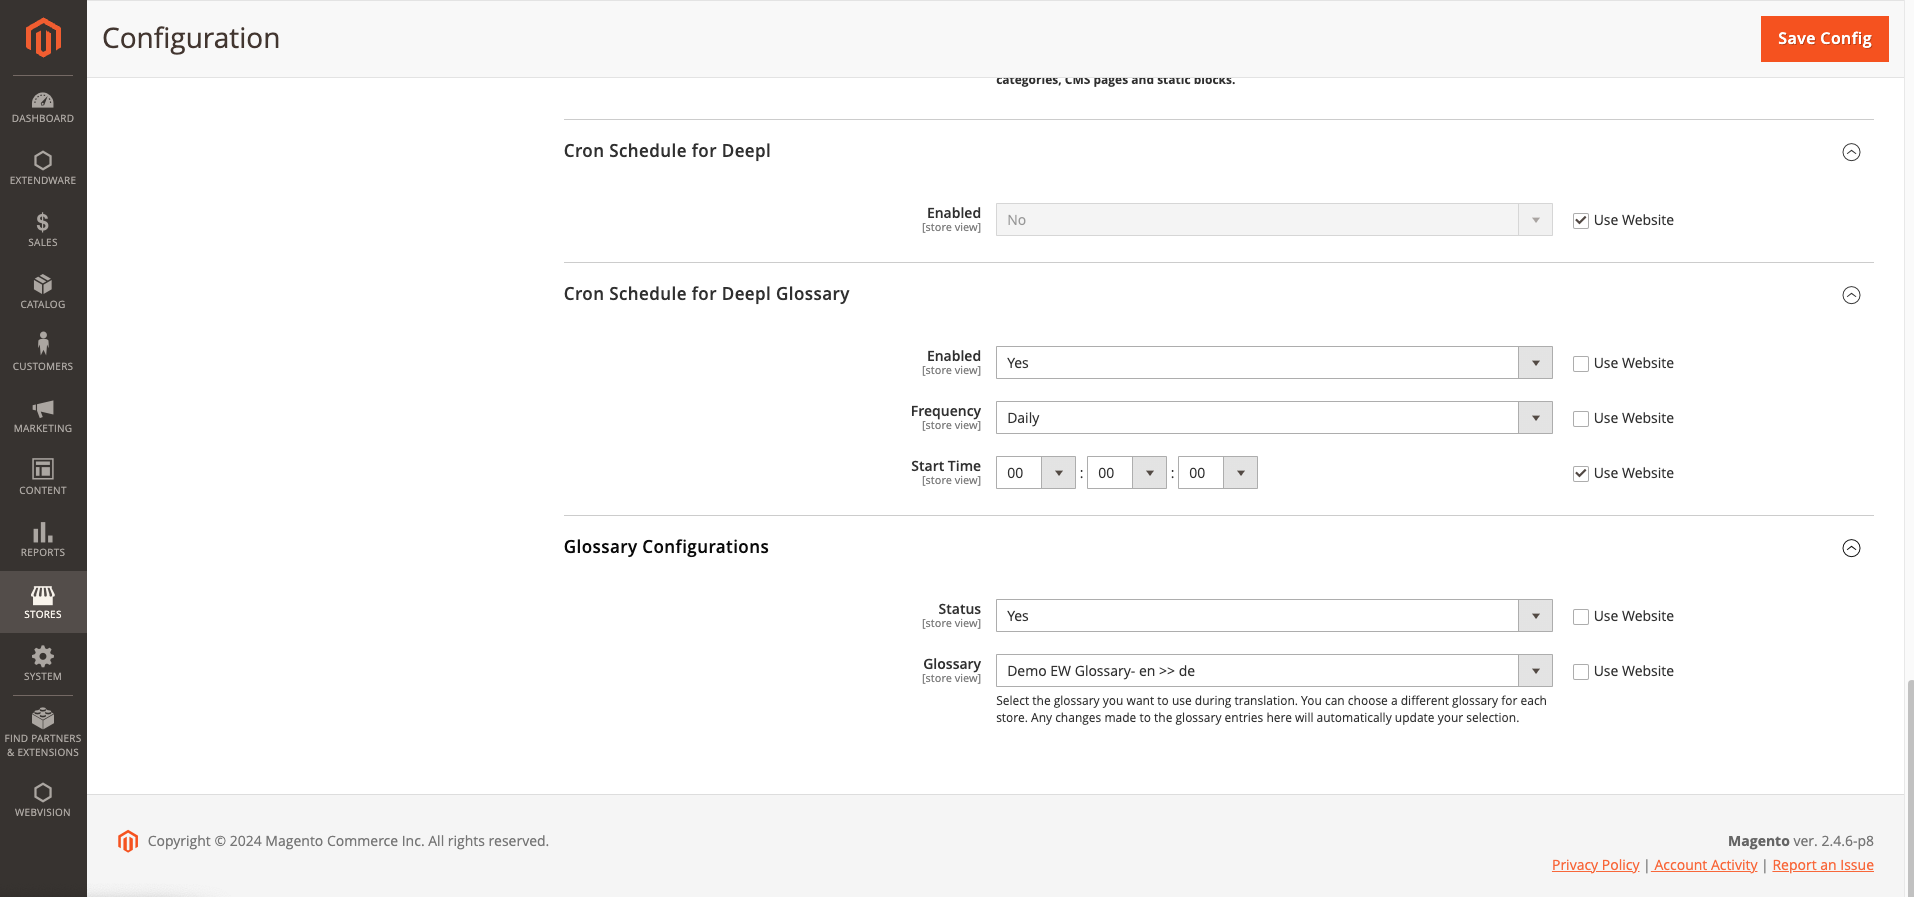
Cron Schedule for DeepL Glossary
Enabled: A toggle to enable or disable the cron job for syncing the DeepL Glossary. When set to “Yes”, the cron job will run according to the specified schedule to update glossary data.
Frequency: A dropdown to specify how often the cron job should run. Options may include “Daily”, “Weekly”, or other predefined intervals. In this case, it’s set to “Daily”, meaning the cron job will execute once every day.
Start Time: A field where the time for the cron job to run is set. This determines the exact time of day the cron job will execute (hours: minutes: seconds). In this case, the cron job is scheduled to run at 00:00:00 (midnight).
Glossary Configuration
Status: A toggle to indicate whether the glossary functionality is enabled for the store view. Setting this to “Yes” means that the glossary feature is active and will be used during translation.
Glossary: This dropdown allows you to select the specific glossary that will be used for translation in the store view. The selected glossary (in this case, “Deepl EW Glossary - en >> de”) will ensure that terms defined in the glossary are translated as specified when content is translated from English to German (or the selected language pair).
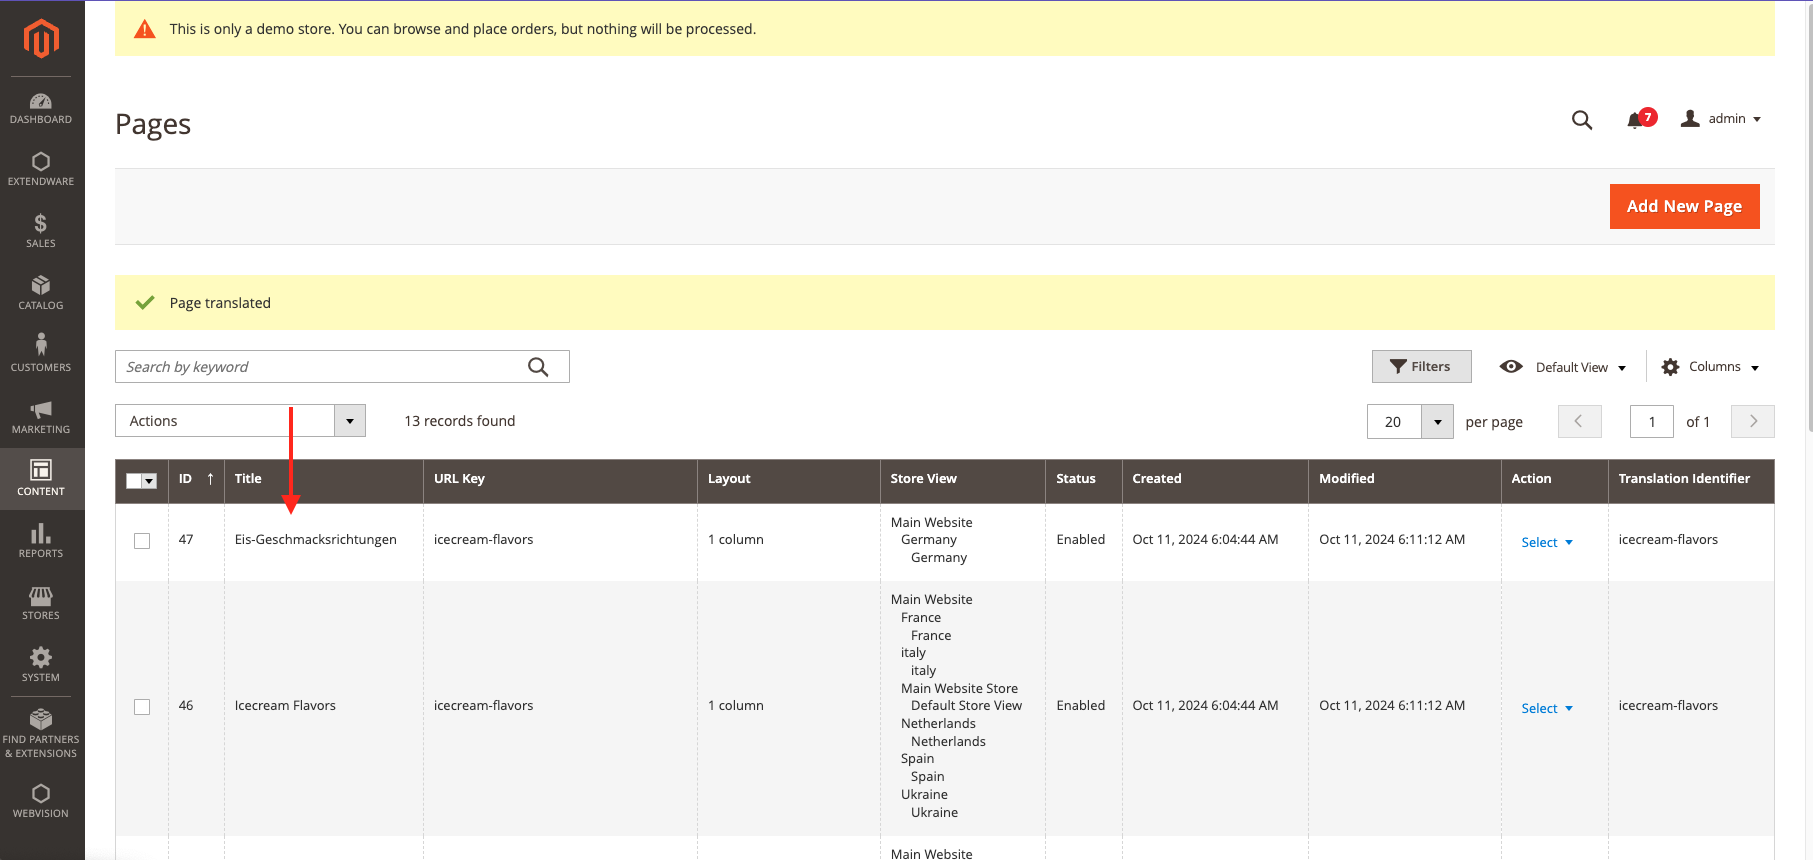
Translate CMS Pages with DeepL Glossary Integration
Create a new page and use the term that you have entered in the Glossary to test the translation functionality.
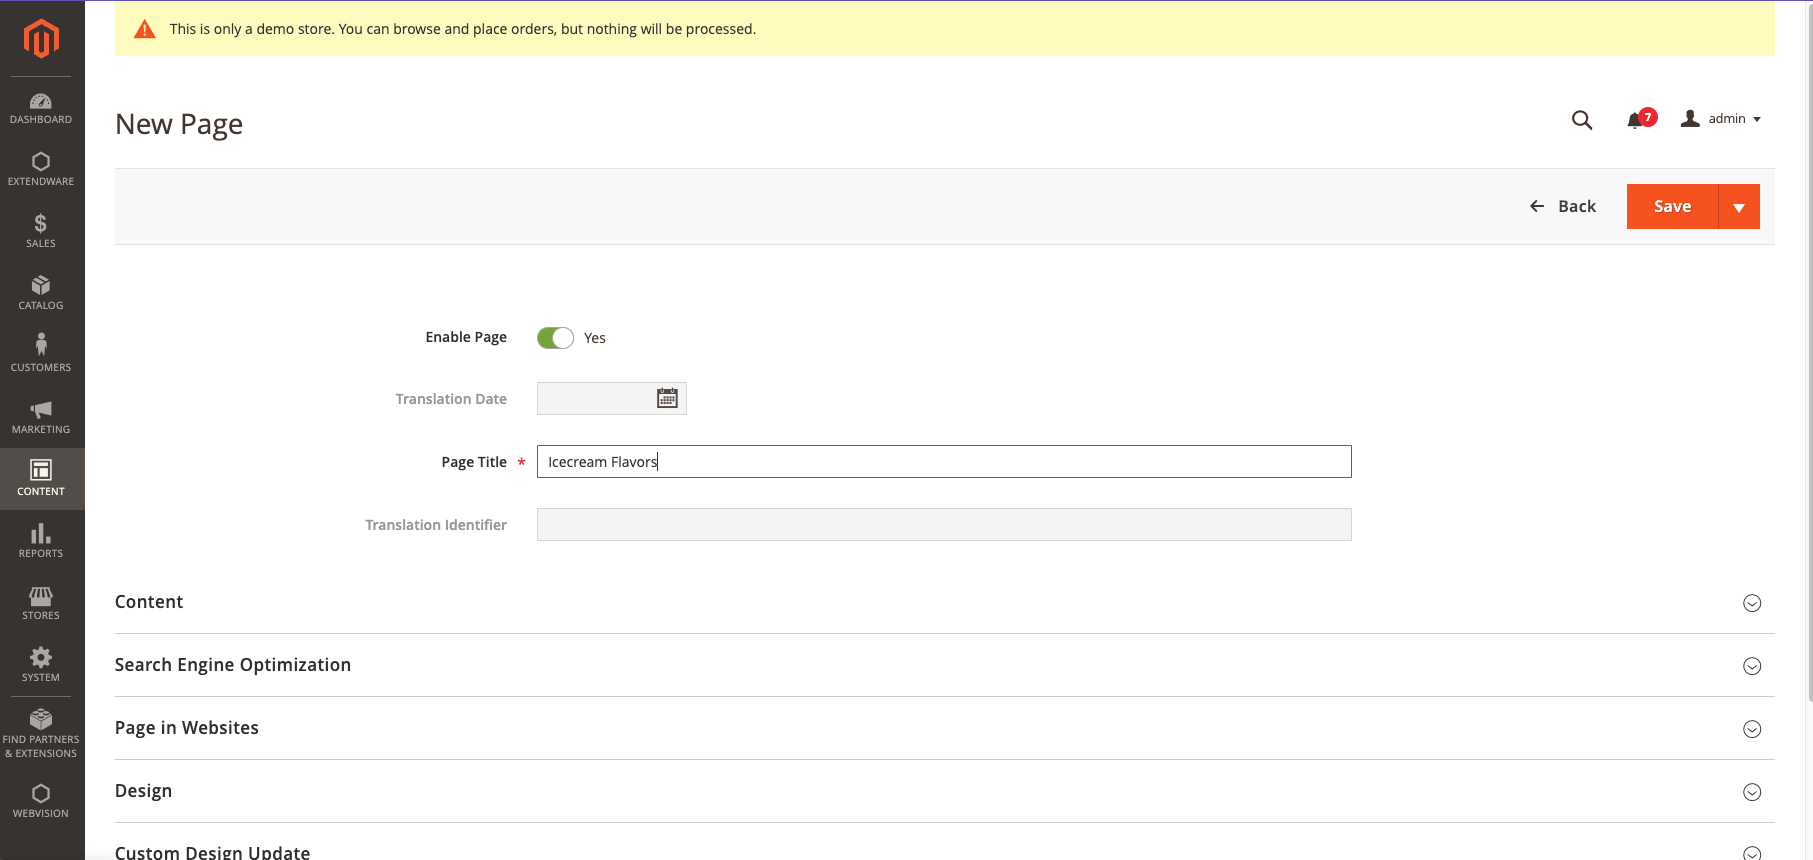
Save the page and then select the target language from the DeepL Translator dropdown list.
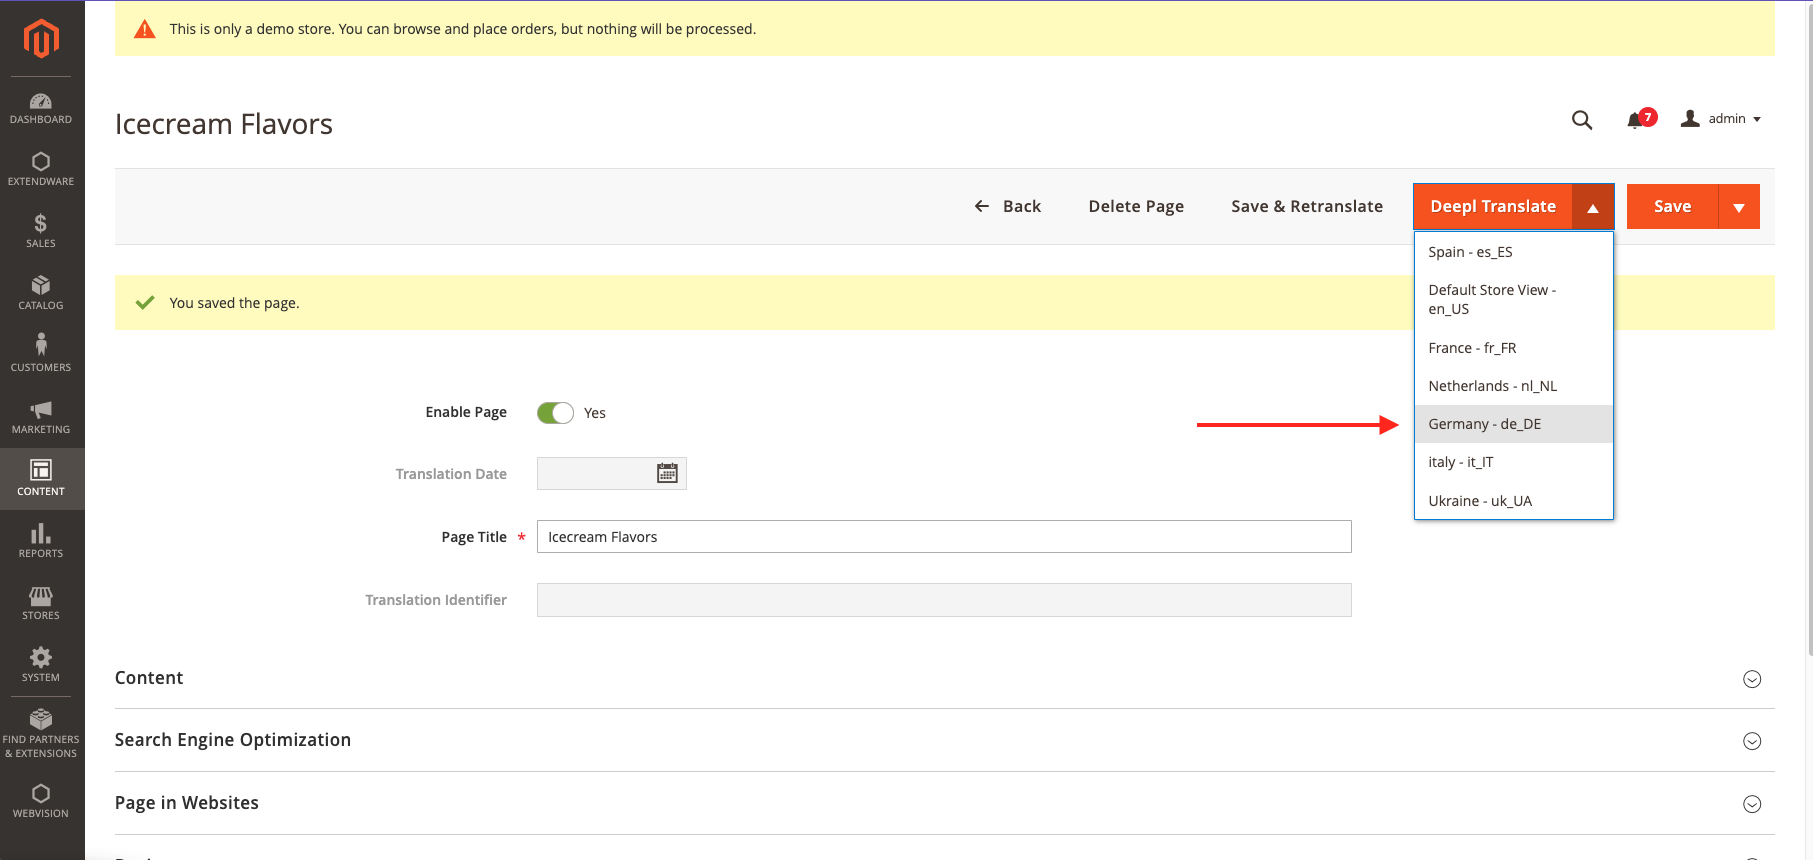
Finally, you will see the page translated based on the terms added in the Glossary.
Import glossary entries from backend
To import new search terms into Magento 2 using the backend, follow these steps:
Navigate to the Dashboard:
Log in to your Magento 2 admin panel.
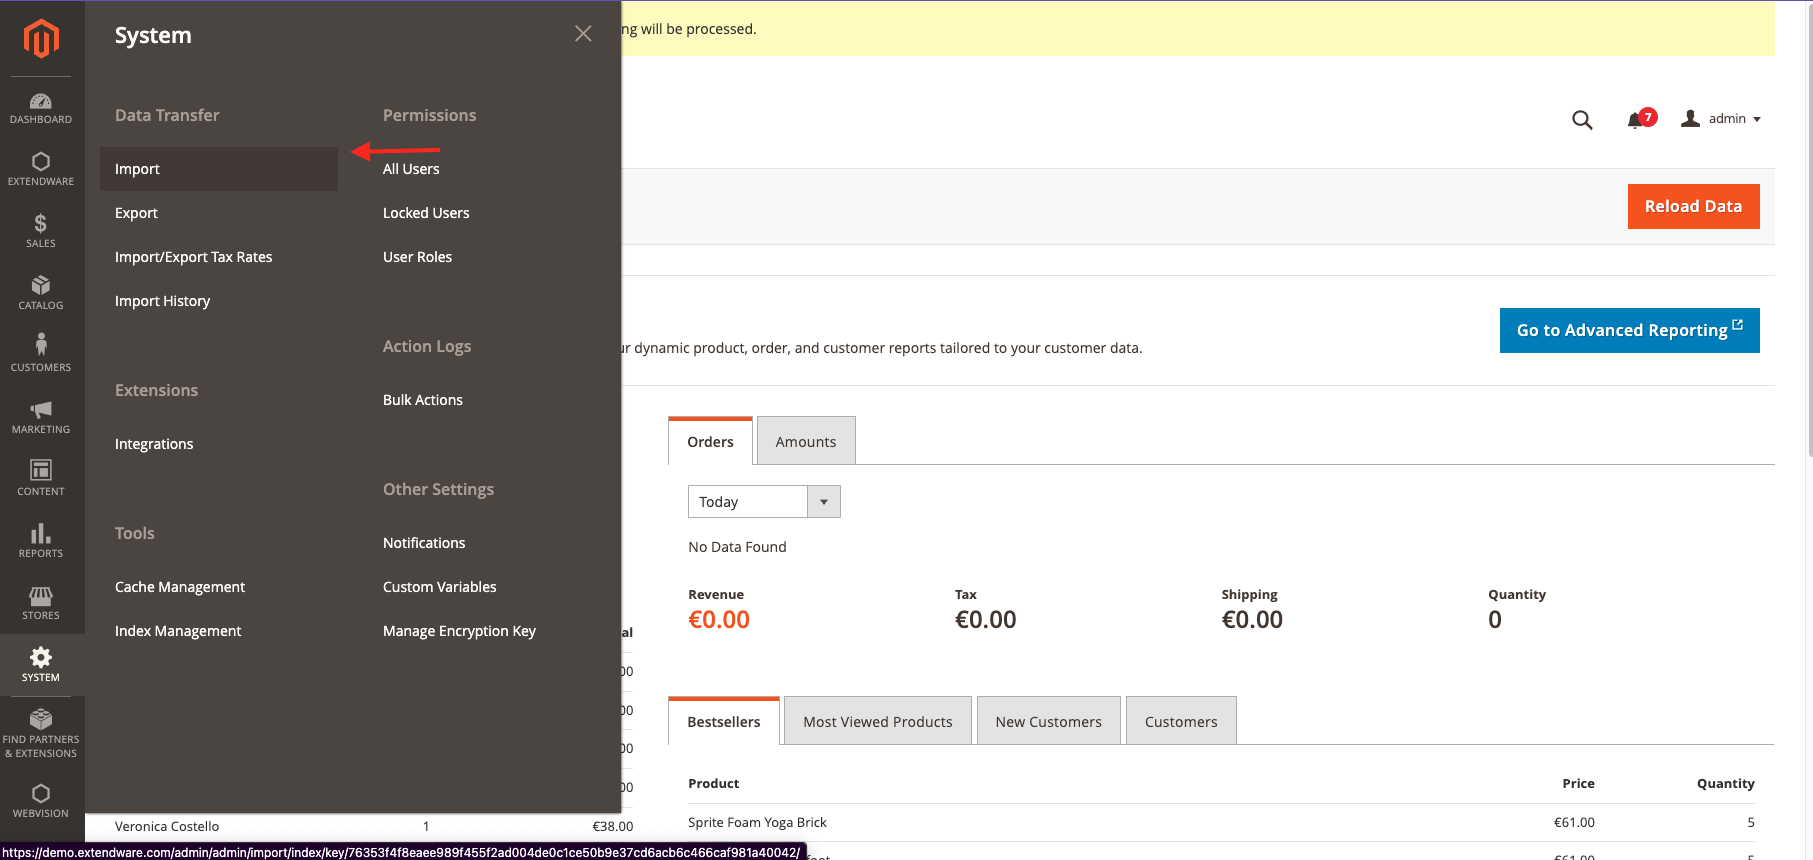
Go to System:
From the main menu, select System.
Access Import:
In the System section, click on Import.
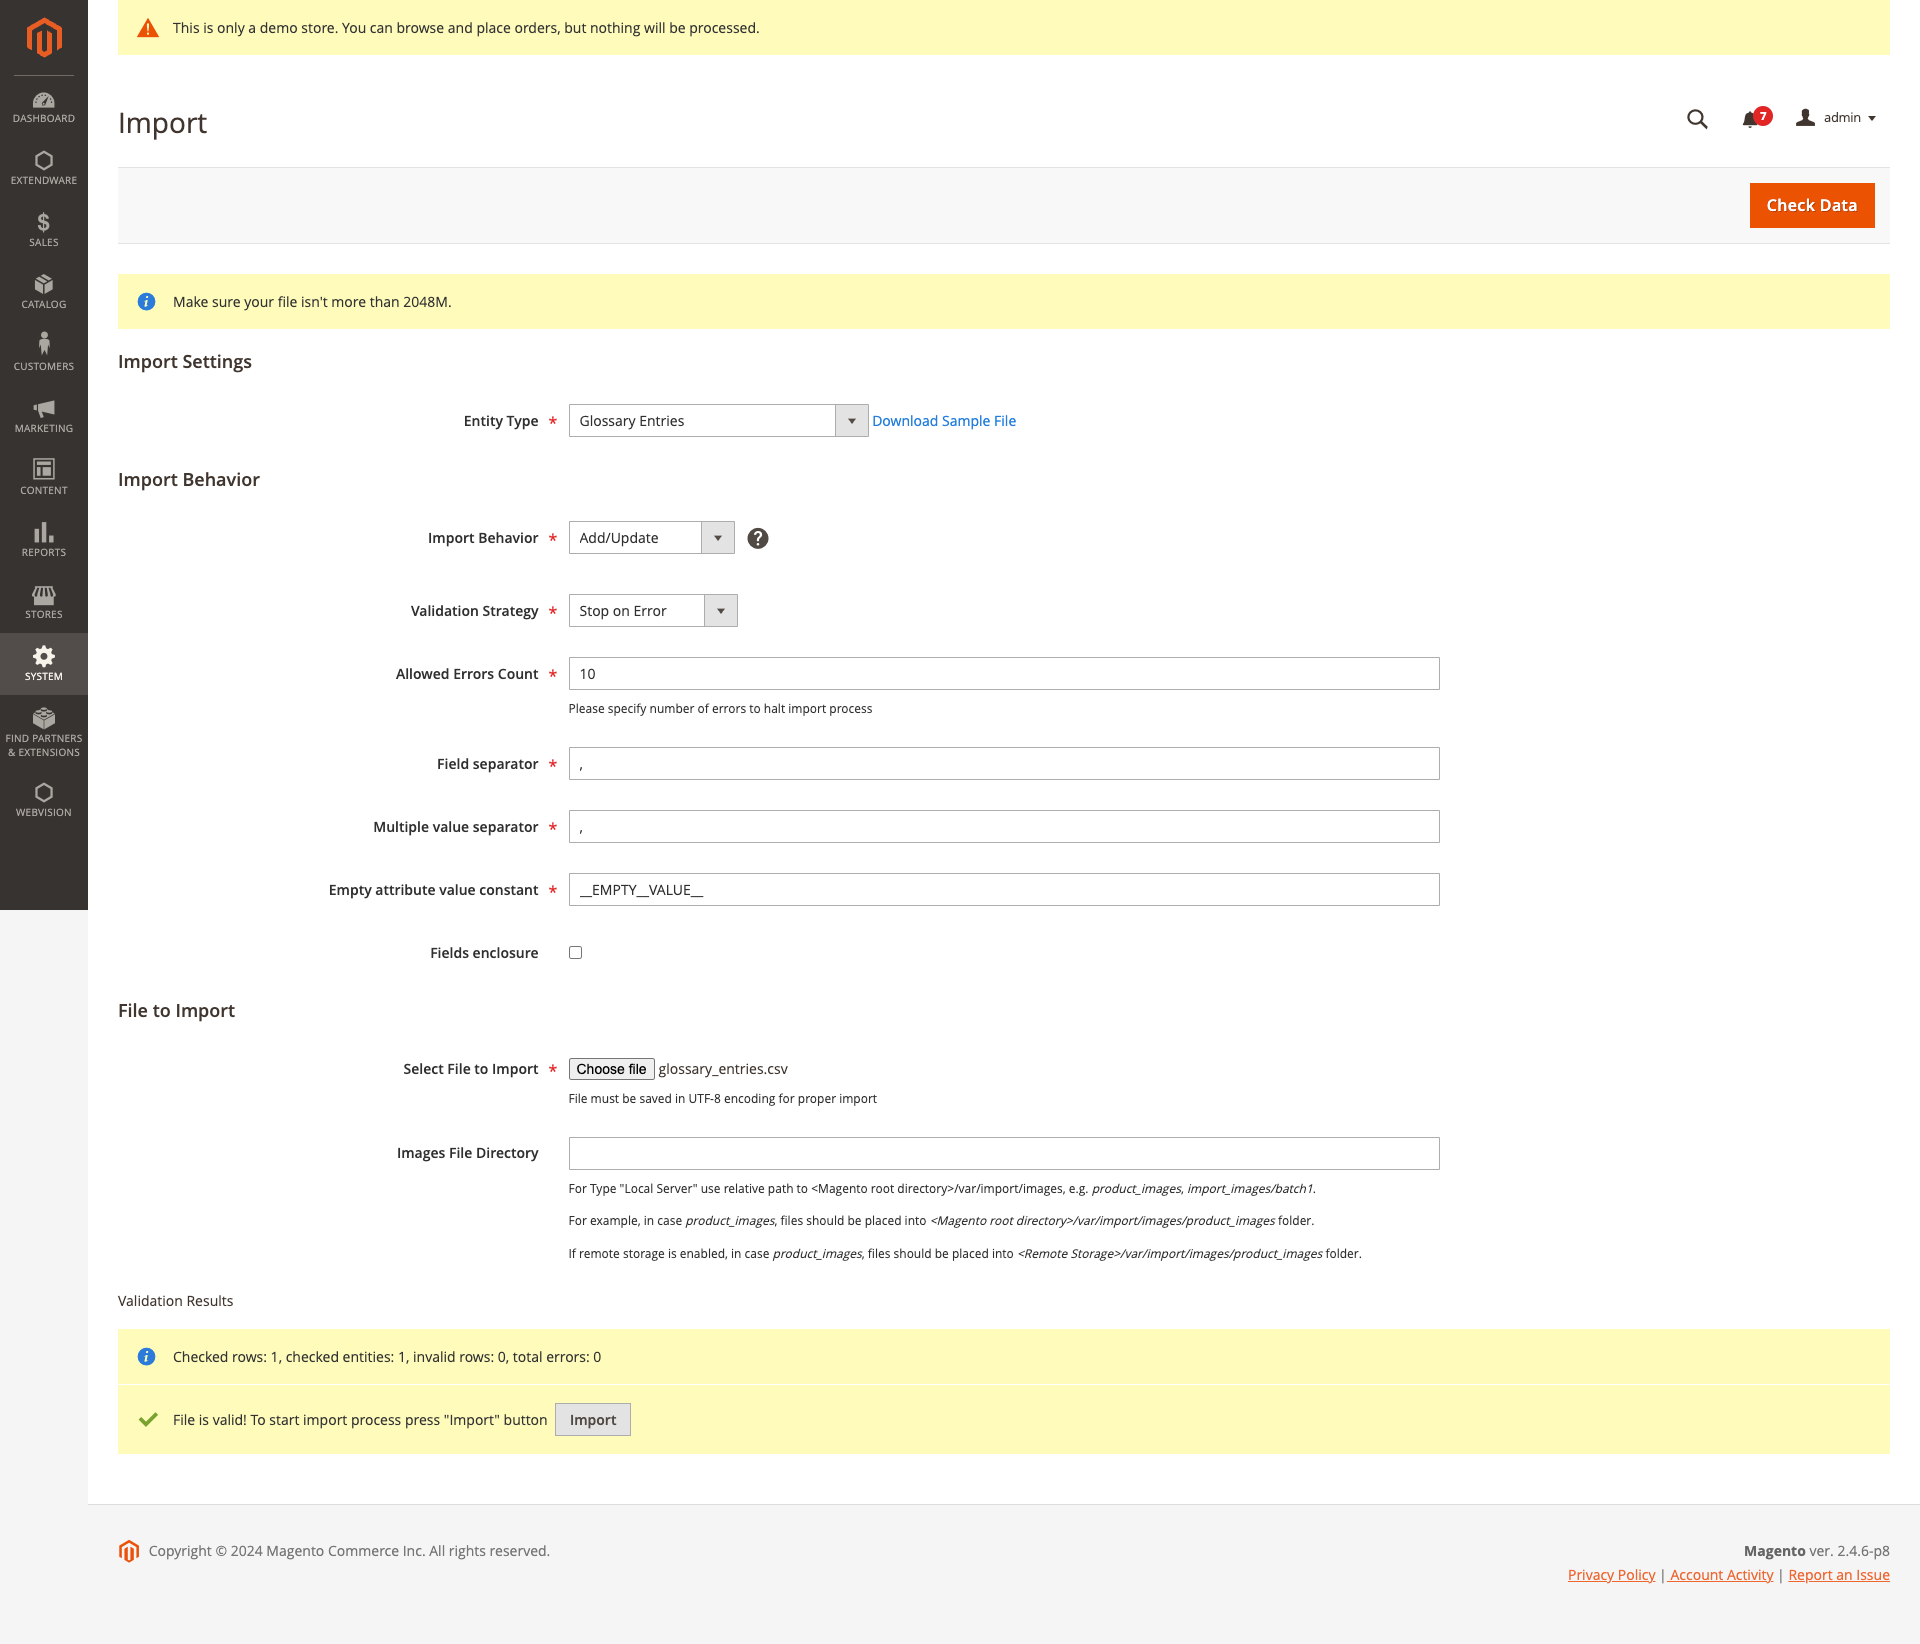
Select Entity Type:
In the Import Settings section, select
Glossary Entriesfrom the Entity Type dropdown menu.Click on Download Sample to get a sample CSV file with all required fields.
Prepare Your CSV File:
Open the downloaded sample CSV file.
Fill in all the necessary fields. Below are the details for each field:
term (required): Add the term you want to translate.
translation (required): Enter the translation for the term.
glossary (required): Enter the glossary_id that has already been created in the Glossary settings.
Upload the CSV File:
Return to the Import section in Magento.
Click on Choose File to upload your prepared CSV file.
Check Data:
Click on Check Data to validate the CSV file for any errors.
If there are no errors, proceed to the next step.
Import:
Click on Import to start importing the glossary entries into Magento.
By following these steps, you can efficiently add or update glossary entries in your Magento 2 store.

Changelog
All notable changes to this project will be documented in this file.
[2.0.0]
Added
Migrated DeepL Glossary integration from API v2 to API v3.
Glossaries created with DeepL API v2 are not compatible with API v3 and must be recreated and re-synchronized.
DeepL does not provide automatic migration of glossaries between API versions.
[1.0.7]
Added
Fix: Import duplicate data
[1.0.6]
Added
Fix: Resolved Store Configuration Value update
[1.0.5]
Added
Feature: Added detailed log for bad request
[1.0.4]
Added
Feature: MassDelete for glossary entries.
[1.0.3]
Added
Fix: Resolved Store Configuration bug when the API key is not available.
[1.0.2]
Added
Fix: Resolved an exception occurring when the “Auto Detect Config” and “Use Config” option is enabled.
[1.0.1]
Added
Introduced a feature to import glossaries seamlessly.
Added the ability to filter and search entries by specific terms.
Implemented a cron scheduler for automating glossary-related tasks.
[1.0.0]
Added
Initial release.